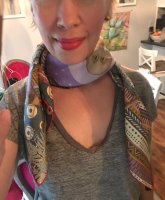
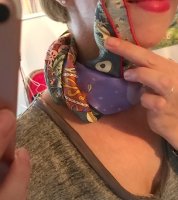
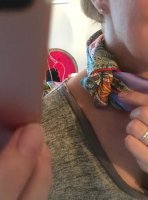
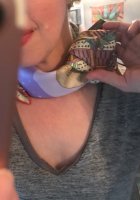
Scarves The How-To Guide for Scarves!!!! NO CHATTER!

TPF may earn a commission from merchant affiliate
links, including eBay, Amazon, and others

It must take me a year to get around to a tute...

A lot of people like pocket squares, but don't know what to do with them. Here's a way to wear 2 together to make it feel more like a 70 or 90 and have minimal knot mess in back of your neck.

Fold two gavroches in to bias folds then make a loop on one end of one gavroche:
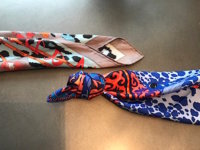
gavknot1.jpg

Slide the other through the loop keeping the tail you made pointing in to the new scarf.
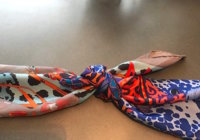
gavknot2.jpg

Do the same loop tie with the other gavroche, making the tail point down the length of the 1st scarf.
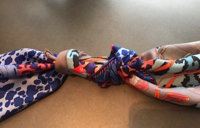
gavknot3.jpg

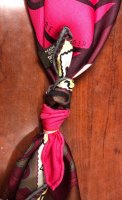
Pull and tighten until the knots butt up against each other. This is an adjustable knot (Bova knot) that's been pulled all the way together.
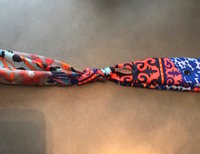
gavknot4.jpg

Put the knot in back and then wrap the two gavroches around and tie in the back in a small knot.
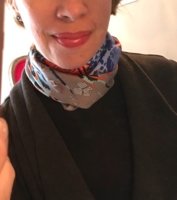
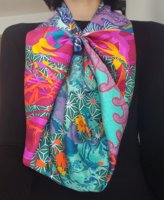
metmduo.jpg
 
Tutorial for this knot that was shown to me by a hostess at FSH.
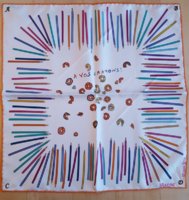
20180203_134340.jpg
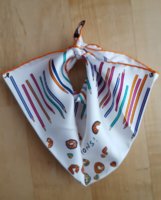
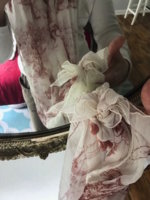
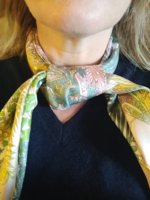
I'm using a gavroche instead to demonstrate how to tie this knot. Start by tying each neighbouring corner to each other. Tie AB, CD together or AC, BD together, however you prefer.
20180204_165240.jpg
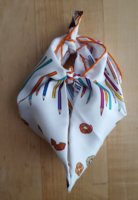
Next, you'll have the silk looking like a bag.
20180204_164837.jpg
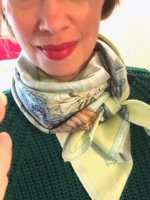
Put the opening over your head onto your neck and tie a small knot from A to B. And voila, done!
20180204_164944.jpg
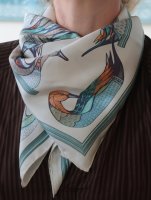
It's a very nice knot to display more of the silk! :)
 
Exploring maxi twillies. This is one of the older longer one, but you can do this with the newer MT "cut" also.

A pretty drape to use on a fitted vest/jacket and very simple. Start with the center of the MT in the front, wrap to the bak around your neck and bring the ends to the front.

zpvestlong.jpg

Tick the ends in the fitted vest/jacket. You can either tie them before tucking (I did here) or just tuck them in untied.

zpvest.jpg
 
More shawl and Maxi Twilly stuff for reference.

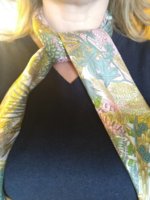
This is an infinity knot. You can do this with the rectangular mousseline stoles, longer maxi twillies (have not tried it yet on the shorter style) and 140's folded on the bias.


Place the stole/MT/bias folded 140 centered on the back of your neck and tie the tips together. No need to be careful about how pretty it is, just not too much fabric, as you are trying to minimize the knot.
infinity1.jpg


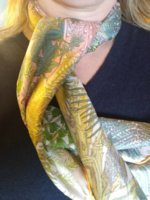
Wrap it several times over your head.

Looks like this with mousseline:

infinitystole.jpg

And this with a maxi twilly (the knotted ends are hidden behind my neck):

brazilgreen.jpg
 
And the Cowboy pleat (because I don't like puffy cowboy knots)

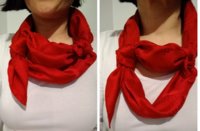
Super easy. Just make small accordian pleats in the scarf after you have folded it in to a triangle.

Tie like cowboy style in back, bring ends to front, tie again. Then gently tug on the pleated area to make it drape a little. Works fine on 90's and 100cm. (I think you'd have to drop the front tie on a 70, but could still pleat it....)

Pleat several times. The more you pleat, the shorter your front cowboy triangle becomes.

cowboypleat1.jpg

Pleated, tied in front and then I tied the remaining triangle ends to get them out of my way. They tend to just tuck up under the front bulk.
bainstshirt.jpg

Pleated, tied in front, with minimal triangles hanging down on a 90.amoursval.jpg
 
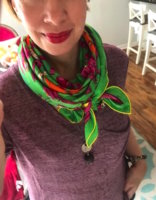
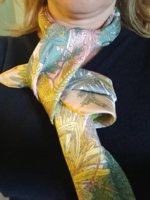
I am sure this knot must have been done before by somebody else but bunnycat suggested I pop it on here. It is a nice way to turn your scarf into a real feature. I hope the photo steps are self explanatory. [emoji16]
1) Bias fold your scarf until it is quite a thin strip. Do a half knot.
2)Fold the top strip over and under the bottom strip.
3) Bring it back round as shown.
4)Tie and pull the two ends to the back of your neck and tie them together.
5) Voilà!
IMG_20180504_173736.jpgIMG_20180504_173727.jpgIMG_20180504_173712.jpgIMG_20180504_173654.jpgIMG_20180504_081556.jpg
 
At @bunnycat’s suggestion - here is how I tied my two gavs together.
I’m cheating and using bunnycats’s excellent tute for the Bova knots :
So - tie the two scarves together using Bova knots - this lets the scarves lie flat behind your neck and there are no ends poking out - see bunnycat’s tute:

It must take me a year to get around to a tute...

A lot of people like pocket squares, but don't know what to do with them. Here's a way to wear 2 together to make it feel more like a 70 or 90 and have minimal knot mess in back of your neck.

Fold two gavroches in to bias folds then make a loop on one end of one gavroche:
View attachment 3917017

Slide the other through the loop keeping the tail you made pointing in to the new scarf.
View attachment 3917020

Do the same loop tie with the other gavroche, making the tail point down the length of the 1st scarf.
View attachment 3917019

Pull and tighten until the knots butt up against each other. This is an adjustable knot (Bova knot) that's been pulled all the way together.
View attachment 3917018
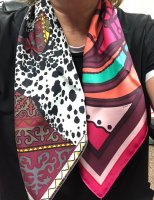
IMG_3292.jpg
Then put the scarves behind your neck, ends hanging in front
IMG_3293.jpg
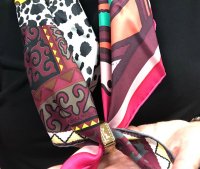
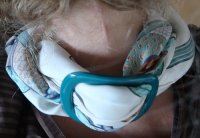
Then put the two ends through a scarf ring - one end going right, one going left
IMG_3294.jpg
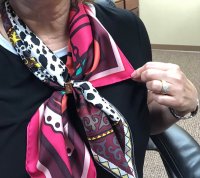
Then reach inside to pull out one point from each side
IMG_3296.jpg
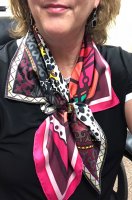
IMG_3297.jpg
I learned this tie from ABQ2ATL [emoji173]️
 
Ok- Here's the requested Bova Mach 2 (Bunny's Biased Bova knot)! :)

There's lots of pics because it's also a recap or alternate way to do the Bova Knot and the way I do it now. So you can use the same idea for tying a regular Bova knot (cowboy style) or the bias fold version.

Start by bias folding your scarf and tying it around your neck in a a regular half knot.
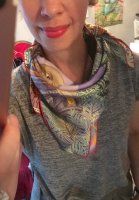
bovastart.jpg

Turn it around so the tails are in the back. Notice the ends come up and over the bias folded part on the left side in the pic and down under on the right side. You'll need that in a second.

bovatieback.jpg

Start with one of the ends. I usually start with the side you see on the left (the up and over side). Following the direction it has already gone, come under the bias fold and back up to make a full loop and then tuck the end in from the back to the front and pull.

bovaleftwrap.jpg
bovalefttie.jpg

Do the same on the right side. Follow the direction the tail are going so you don't undo them. So you need to go over and under to make a full loop. Tie back to front again so the ends point down.

bovarightwrap.jpg
bovaright.jpg

That's it! adjust and tighten them up. You can move the knots around a little while they are untightened.

bovamach2.jpg

And I use the same method to tie a Bova knot. Just triangle fold (pleat or not...but I think it is easier to deal with pleated a little) tie a half tie in back and do exactly the same wrapping technique with the ends.
acteprebova.jpg

actemoon.jpg
 
Please do! Thank you!
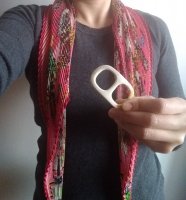
This is basically what MaiTai calls a Cascade Knot, but modified. Instead of using a round anneau-style scarf ring, I use a basic slide ring (shaped like Chain d'Ancre, but generic and lightweight) because I found that the opening on a round scarf ring way too small and it felt like I was crushing my pleats if I tried to squish two scarf ends through.

Basically, I pull a pinch of one side of the scarf material into one side of the slide ring, then pull a pinch of the other scarf tail into the other side of the slide ring.

The other modification to this method that I made was to position the ring *behind* the scarf and do it backwards. This accomplishes two things. 1) It hides the scarf ring. 2) I don't need to fuss about making an inadvertent bow. Most of the time, I don't want to look "pretty" or "cute" and bows tend to do that to me.

Here's the illustrated version. (Apologies for the over-exposed shots. The morning sun was kind of bright and it wasn't easy to take a selfie with one hand while illustrating the tie with the other. Haha)

1. Start with the plisse folded in half and draped around your neck, with a lightweight slide scarf ring.
IMG_20181026_102916770.jpg
2. Put the ring behind the scarf and guide a pinch of material through one side of the scarf ringPhotoGrid_1540587152111.jpg
3. Do the same for the other side:
IMG_20181026_103034588.jpg
4. Fluff and wear!
IMG_20181026_103048009.jpg

Bonus: using the ring on the front can give you a "bow." You can also mix it up so that half the ring is in front of the scarf and half is behind, change the tail lengths, change how much or little you pull through the loops... It's easy and gives a plisse that unique sculptural look. IMG_20181026_103156547.jpg
Hope that helps!
 
For @HoneyLocks!
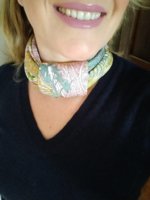
Here’s how I tied it -
Start with the scarf folded in half and then in half again- so you have a rectangular shape.
Put it around your neck, ends in the front.
Take the two corners nearest your throat and tie a knot
IMG_5491.jpg
IMG_5492.jpg
Then tie another knot (so a double knot) and kinda pull it quick because that will pop up the hems. I turn it to the side just I think that gives it a cheery, jaunty look.
IMG_5494.jpg
I hope that helps! [emoji4]

(holy guacamole - I am obviously channeling Nora Ephron and her book "I Feel Bad About My Neck" :hrmm: )
 
Last edited:
Scarf ring pendant with any Chain d'Ecre

This is with a 55 but you could use a 70

Fold on the bias
Fold length in half
Thread the end of fold through either side of Cd'E ring
Thread both open tail-ends through the scarf loop
Gently pull through. The ring should now be secured
Tie the tail ends at the back of the neck
Voila!
 

Attachments

  • Bandana2_zps2byhqcyt.jpg
    Bandana2_zps2byhqcyt.jpg
    44.7 KB · Views: 947
Here's a variation of a "Bova knot" (this knot is becoming quite the TPF legend!) @Bova123 initially explained it here. @bunnycat has a great illustrated explanation here. It's basically a double slip knot used to create two sliding/adjustable knots in a cowboy tie.

I wore this modified version this week, as a "necklace" of sorts in a 140. Here's my illustrated explanation, using a 90 jacquard:

Start with a basic bias fold draped evenly across your neck. Taking one of the ends, tie it around the other in a basic slip knot.
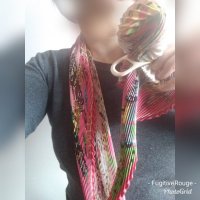
PhotoGrid_1553056211073~2.jpg

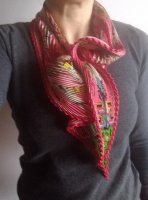
Then, take the other long end, and bring it to the other side, tying another slip knot.
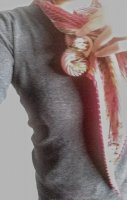
PhotoGrid_1553056408797~2.jpg
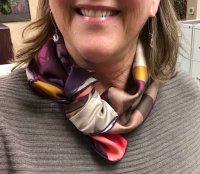
Don't be annoyed it disheartened if it looks sloppy and strange. All you have to do is tighten the knots to your liking (make long tails or short tails) and slide them around until you get the look you want. PhotoGrid_1553056441437~2.jpg
Edited to add: this is basically what Bunnycat did [above in this post] but with the double layer turned to the front as a feature.
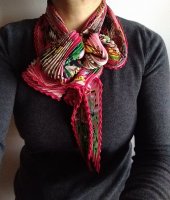
 
Last edited:
Here's a variation of a "Bova knot" (this knot is becoming quite the TPF legend!) @Bova123 initially explained it here. @bunnycat has a great illustrated explanation here. It's basically a double slip knot used to create two sliding/adjustable knots in a cowboy tie.

I wore this modified version this week, as a "necklace" of sorts in a 140. Here's my illustrated explanation, using a 90 jacquard:

Start with a basic bias fold draped evenly across your neck. Taking one of the ends, tie it around the other in a basic slip knot.
View attachment 4377773

Then, take the other long end, and bring it to the other side, tying another slip knot.
View attachment 4377777
Don't be annoyed it disheartened if it looks sloppy and strange. All you have to do is tighten the knots to your liking (make long tails or short tails) and slide them around until you get the look you want. View attachment 4377780

Edited to add: this is basically what Bunnycat did [above in this post] but with the double layer turned to the front as a feature.
Thank you kindly for the shout out fugitiverouge, your variation looks really looks lovely!
 
Top