You are using an out of date browser. It may not display this or other websites correctly.
You should upgrade or use an alternative browser.
You should upgrade or use an alternative browser.
I did the unthinkable... my SO K25
- Thread starter frankiextah
- Start date
TPF may earn a commission from merchant affiliate
links, including eBay, Amazon, and others
More options
Who Replied?I looked at your first pictures and I think it turned out great and I wonder if H will even notice the change as your work looks meticulous! Sad to hear you had to take matters in your own hands, but you are more than capable!Some of you may recall I have posted my very first SO K25 in the below thread (post # 6684):
https://forum.purseblog.com/threads...-did-yours-take.797364/page-446#post-32598531
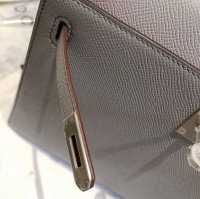
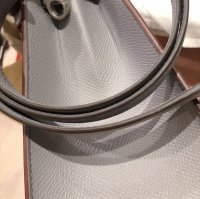
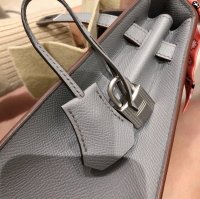
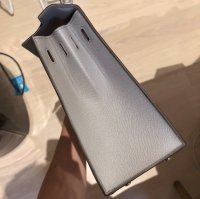
I did the unthinkable... I took the matter into my own hands and changed the edge paint myself! I think Docride is about to faint about now...
I researched on the edge paint color and supplier H uses, watched numerous youtube videos, purchased everything I needed (blade punch tool, sand paper, edge paint, chamois, scotch tape), and also a small sheet of epsom leather to practice on, and went at it! My husband couldn't take the stress and had to physically remove himself from our home for the day LOL.
Sequence of events (to be repeated for every part of the bag) -
1) sand away as much of the old edge paint as possible (500 grit paper)
2) apply 1st layer
3) smooth 1st layer with 1000 grit paper
4) apply 2nd layer
5) smooth 2nd layer with 1000 grit paper
6) apply 3rd layer
7) buff with chamois cloth
The whole process took approx. 10 hours as time was needed for each layer to dry... this was a pretty grueling process but I'm so glad I did it so now I can be at peace and enjoy her fully.
And I know, H will probably deny spa service in the future but this is something I am willing to sacrifice so that I can fully appreciate and use the bag.
Disclaimer - you probably don’t want to try this at home, I have an architecture degree so am used to model building and meticulous painting jobs.
without further ado, here are the photos!
View attachment 4218623 View attachment 4218615 View attachment 4218619 View attachment 4218621
View attachment 4218622 View attachment 4218618 View attachment 4218617 View attachment 4218616

Also, I hope you have given your DH a glass of something soothing after all you put him through!!!

You are freaking crazy and did an outstanding job!  Totally love the black! Kudos to you...enjoy your beautiful K
 Totally love the black! Kudos to you...enjoy your beautiful K
Wow, thank you guys for the supportive and positive vibes!
The true color of the edge coat is actually a super dark off black-brown with a charcoal undertone, it’s an almost identical match to the edge coat of my constance in Gris Mouette.
I did some research on the edge coat brands - stahl is the official supplier for H edge paints but near impossible to source as it is primarily a B2B company, other options I found were Giardini, Fenice and Vernis. In the end I chose Vernis due to it does not require heating, it moves very well with leather, gives the smoothest finish, has the best viscosity and gives the most neutral sheen (not glossy and not overly matte), so that’s the perfect choice for me to ensure the most even application.
I bought 3 colors - black, chocolate, and dark brown just in case. Chocolate ended up being the perfect choice - deepest black-brown with a charcoal undertone, and not as harsh as deep black. I’m happy to own the other shades as the black one would come in handy for fixing bags that currently have black edges.
I have to say, scotch tape was my best friend masking leather surroundings in places where the edges were touching the leather surface. In terms of sanding, I was able to break off a small piece of sand paper and tape it around the pin tool, then I used it to carefully drag it back and forth over the old edge paint (with he scotch tape masking the surrounding leather of course).
Here are the tools I acquired:

Last edited:
Amazing work! And you were right...Looks much better with this edge color. Who knows...they might not even detect the change if sent to spa. Congrats on a job well done[emoji106][emoji106]
Did you have any OMG moments while doing this?
Did you have any OMG moments while doing this?
good question!
- as soon as the first edge was done I knew I already loved the new color which gave me a lot of encouragement to finish it
- it was way easier than I thought it was going to be. The texture of a top quality French made edge paint really made it very easy to use, the pin tool somehow just dispersed the perfect amount of product and the paint glided super smoothly onto the edge
- epsom is probably the most forgiving leather in terms of cleaning up screw ups, the leather is FINISHED therefore the coating prevented any overflows from seeping into the leather, I was able to "wipe off" all the mistakes with my pinky finger with the leather staying totally clean. For any dried up overflows I was able to carefully buff everything out cleanly with 1000 grit sand paper without hurting the leather at all
- THERE WERE SPOTS MISSING EDGE PAINT inside the loop openings!! I fixed it for the artisan with the new edge paint LOL
Wow!!! You are amazing and bold. I wouldn’t even know where to start and you took matters in your own hands. This looks so fabulous. I understand now what you were going for!
SO amazing. I actually agreed with you that the original edge paint color was not the best for that bag but didn’t want to say anything. Had I known you were so crafty, I would’ve told you!
I’m also familiar with edge paint and another little trick is to have a bunch of q tips ready to wipe off excess. I recently touched up a delvaux bag when I accidentally scraped the edge along stucco.
I also have a project in the works. I unstitched a H leather bracelet and plan on redoing the saddle stitching myself with a contrast thread color to give it some pizzazz. I feel like we are two peas in a pod!
I’m also familiar with edge paint and another little trick is to have a bunch of q tips ready to wipe off excess. I recently touched up a delvaux bag when I accidentally scraped the edge along stucco.

I also have a project in the works. I unstitched a H leather bracelet and plan on redoing the saddle stitching myself with a contrast thread color to give it some pizzazz. I feel like we are two peas in a pod!

You are very determined, crafty and obviously have a steady hand. Personally I would never had done it but I do understand that it was a huge disappointment and completely unexpected that your SO had brown edge paint. I agree that black looks better than brown, especially with phw. Even if the resin doesn’t stand out I undestand that it bothered you and you took measures. Chocolate brown isn’t a favourite colour for me either. I can only tolerate it in small dozes.
Register on TPF! This sidebar then disappears and there are less ads!


