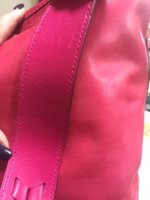
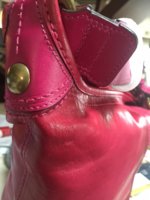
Happy to help you out! I got my rehab process from this forum-it's a treasure trove of helpful advice!!
1. Bathed Willis in sink filled with warm water and a spoonful of Dawn dish soap. Let the bag sit in water for about 20 min. Since the water was so dirty, I drained and refilled the sink a second time with warm water/Dawn.
2. Rinsed well and dried with some towels. I stuffed the bag with crumpled paper towels to re-shape then put it in my basement where it's nice and warm.
3. I should've started conditioning the day after the bath while the bag was damp but didn't have time so the bag dried for 2 days before I started conditioning.
4. I used Brasso to polish all the brass.
5. Started conditioning/dyeing by mixing Saphir Juvacuir in black with Saphir Leather Balm. Since the bag was in such bad shape and so dried out I knew I would use a lot of conditioner for the first coat. I used at least a couple spoonfuls of dye mixed with about 1/8 cup leather balm. (I'm just guessing at amounts. In reality I squeezed a bunch of dye into a plastic tub and then added a healthy dose of conditioner!) Stirred the mix and applied all over the bag and straps with a rag. Used this mix on every smooth leather section of bag even the interior pockets. I use this combo of dye and conditioner because my local cobbler recommended staying within the same brand of products to mix dye and conditioner and she picked them out for me.
6. After first coat dried, I rubbed in 2 more coats of the leather balm letting the bag dry between coats and buffing with a horsehair brush.
7. Next I used my fingers to rub in Blackrocks all over, let dry and buffed with horse hair brush then a clean rag.
8. The tongue area on outside flap and the raised leather piece with the clasp were both missing the edge coating and had what looked like exposed brown cardboard showing so I cut up thin cardboard to shove under these pieces all around. Then I used Fiebing's Edge Kote in black with a tiny kids paint brush to coat the edges. It only took one coat. The dyeing process covered most of this damage.
9. I went back over all the brass again with a tiny bit of Brasso on a paper towel.
10. On the shorter piece of strap there was a tiny section (about one stitch in length) that was coming apart near the buckle and I knew I couldn't get a needle and thread through 3 layers of leather so I used Shoe Goo (from Target in the hardware section). I took a piece of jewelry wire, dabbed it into the tube of a Shoe Goo then pushed the glue into the section that needed to be adhered together. I weighted down that piece for an hour or so.
I wanted to mention there was a tiny section of piping on a corner that was worn out. After the dyeing and conditioning, you can't even see this worn area. I decided to let it go rather than make a mess using puffy paint or some other product.
That's about it! Hope this helps you out! Good luck with your Willis! This rehabbing is addictive-I need more
Coach bags like I need a hole in my head yet every day I'm trolling through EBay looking for "treasures"!

 lol. I will let you know when I get it and will def take some before and after pics. Stay tuned.

 Funny you bring up this auction. I saw it last week and was interested and actually emailed the seller about what appeared to me to be rivet through the strap. She emailed back promptly assuring me it was adjustable. Maybe meant the the other side?? But I decided to pass on it based on the spotting I could see up close and the binge buying of bags I did at the beginning of February lol. Then the auction ended. And then I saw it come back and you guys are bringing up the rivet too.