Just before and after pics of my first project. Thanks to all of you TPFers out there, an old dog can learn new tricks!
Wow - that looks great! I'm working on one of these right now and hope mine turns out as pretty as yours!
TPF may earn a commission from merchant affiliate
links, including eBay, Amazon, and others
Just before and after pics of my first project. Thanks to all of you TPFers out there, an old dog can learn new tricks!
Wow - that looks great! I'm working on one of these right now and hope mine turns out as pretty as yours!
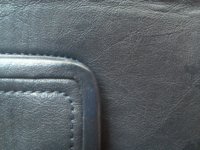
I found out how to post photos from my computer so here are a few of my damaged purse that I managed to upload.
I found out how to post photos from my computer so here are a few of my damaged purse that I managed to upload.
I think that would look amazing in some shade of navy with the black edging!
There's a Balenciaga dyeing tutorial using Tarrago, I believe it's petitepear's, if you haven't already seen it. That and some other dyeing tutorials and references, some from the Coach Rehab thread, are listed here: http://forum.purseblog.com/showpost.php?p=29903496&postcount=5
Good luck and please report back!
 Thanks for the links and the encouragement. Much appreciated!
 ")
Photos after applying 1 coat of Tarrago Navy Dye. The purse is still wet in the photos. I decided to apply the Dura Edge after doing the first coat because the dye seems to be covering the edging. I will work on the edging until I'm happy with it and apply the final coats of dye. The purse really soaked up a lot of dye. I went through about 3/4 of the bottle just during the first coat. I imagine subsequent coats will take less dye. Taping off the lining was pretty useless as the tape came loose. I ended up taking the tape off and carefully applying the dye with a small flat paintbrush. I used makeup triangle sponges for the majority of the application process and a small paintbrush for the hard to reach areas. So far so good! I'm looking forward to seeing how this turns out. If I could go back in time, I would probably give the purse a bath and condition her really well so she wouldn't soak up so much dye but maybe absorbing a lot of dye is a good thing... I don't know. Oh, I also ended up just using the navy dye because the midnight color has still not arrived. I can always use that as a top coat if I don't like the look of the navy alone and it may give it an interesting look. We'll see.
Here are pics of her drying in the garage. I'm using a book to weigh her down and hanging her from a hanger attached to a towing strap attached to a shelf bracket. She is looking rather spotty and uneven but I trust that that will be remedied with the next coat. I think that hanging out with a book may even give her posture a boost.

Did you try rinsing it really thoroughly? I've dunked bags with this kind of fabric. They had vachetta trim which darkened somewhat from the water though. I would try cleaning it with soap and water.
Thank you Whateve for the advice. I tried more soap and water (a lot more water) for the spots and now that dried out no more marks.
Now perhaps the result of all the water to clean the spots on the bottom, the outside leather shows a ring that was not there before. How do I get rid of it, do I have to dunk the bottom?
I also need to ask if there is a way to clean the denim transfer from the canvas, I know it is very difficult in most cases, but this being a cream color fabric, no leather, perhaps there is a way to try being a bit more "aggressive".
Thank you so much, and wow! Since I last visited this thread I see a lot of new people doing wonders, the experts here are so talented and helpful
Here are pics of her drying in the garage. I'm using a book to weigh her down and hanging her from a hanger attached to a towing strap attached to a shelf bracket. She is looking rather spotty and uneven but I trust that that will be remedied with the next coat. I think that hanging out with a book may even give her posture a boost.
Yeah that color is great - loving it. I've only dyed once, on a non-Coach, but had the same first coat unevenness and later coats fixed it. I found a circular motion when applying worked better for evening out streaks but YMMV.
ETA: There is a discussion on here someplace about others' success with restoring shape without having to dunk, like steaming, stuffing with towels hot from the dryer, etc.
You are giving me dye fever! Love the pics - keep them coming
So I decided to try dunking a Sonoma. It's quite a different experience for me, since I've never dunked a double-layered flap, fabric-lined bag before. I think it's coming out fine, no problems so far, she's still in the drying phase.
Necessity being the mother of invention, I scrounged around my pantry and came up with this drying setup. I'll turn it right side up after a while and put the containers side by side, so the bottom is weighted and dries flat.
Good morning, I haven't tried this product and haven't the faintest whether it is good for Coach products, but there is a product called Bye Bye Dye from Lovin My Bags. I purchased the vachetta collection to spruce up a pre-loved Louis Vuitton and I am very pleased with the results of the Lovin My Bags products. Perhaps this particular matter or product review may have been discussed somewhere on TPF but I'm not sure.
ETA: Oops got ahead of myself. Perhaps that Bye Bye Dye is strictly for leather so I have no idea if you could use it on fabric. Sorry about that!
") , but I read the reviews for the denim transfer on leather clean up and everyone is very happy, I will have to order some.
, but I read the reviews for the denim transfer on leather clean up and everyone is very happy, I will have to order some.This is the kisslock frame from the navy foldover clutch that I fixed thanks to whateve's advise. The color is pretty close, although if you look closely, you can see a bit of a difference. Whateve, thanks again for telling how to fix that ugly hole with dimensional paint (it took me quite some time because I'd put the paint in layers, letting it dry in between and sanding off the top layer afterwards).
![IMG_3642[1].JPG](/data/attachments/2988/2988536-6804709f1fc3d4f4fc20d1e8759b53f7.jpg?hash=aARwnx_D1P)
![IMG_3644[1].JPG](/data/attachments/2988/2988537-8382a626a930a387bfebe46cdb7db1b3.jpg?hash=g4KmJqkwo4)
![IMG_3647[1].JPG](/data/attachments/2988/2988538-481e92e288f96f6fa18f7e45b3a596b0.jpg?hash=SB6S4oj5b2)
![IMG_3643[1].JPG](/data/attachments/2988/2988553-f844965639b0d55dccb5c971a7483eb6.jpg?hash=-ESWVjmw1V)
![IMG_3650[1].JPG](/data/attachments/2988/2988554-77d5ed4b96b161cb68d6100879e023d8.jpg?hash=d9XtS5axYc)
![IMG_3655[1].JPG](/data/attachments/2988/2988590-531abbcf24d4bc89be7abec532383b54.jpg?hash=Uxq7zyTUvI)
![IMG_3656[1].JPG](/data/attachments/2988/2988591-f6295383a543ace02a4a545ec15a3ee8.jpg?hash=9ilTg6VDrO)