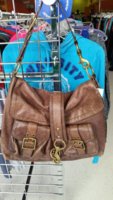
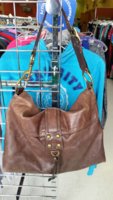
Hello everyone! I'm having issues top handle on my new (used) Willis bag. The handle has some loose threads:
View attachment 3306323
But on closer inspection I noticed that the three pieces of leather are actually starting to come apart. Originally, I had planned to get some Fray Check to take care of that thread, but now it looks like I need to do something a more substantial.
View attachment 3306324
View attachment 3306326
Would it be a good long-term solution to glue the leather together, or should I just suck it up and have it stitched by a cobbler? If I do use glue, which would be best for this? Someone else here recommended Tandy Leather Cement for stuff like this (
http://www.amazon.com/dp/B003W0GFTU/) - does anyone have experience with it?
Sidenote: I'm a shoulder strap kind of gal, but I imagine I'll grab it by the handle from time to time. I don't want to worry about it coming apart down the road

![IMG_3785[1].JPG](/data/attachments/2996/2996681-2959c9a5780fe4fde21d83c5014cc203.jpg?hash=KVnJpXgP5P)
![IMG_3786[1].JPG](/data/attachments/2996/2996682-ad05805eb927d7849c568b8e5786f5f5.jpg?hash=rQWAXrkn14)
![IMG_3797[1].JPG](/data/attachments/2996/2996683-3629327e13cbbdbc1535f25807687daa.jpg?hash=NikyfhPLvb)
![IMG_3812[1].JPG](/data/attachments/2996/2996687-d75635c0709086e42b7ebc58f9af7fff.jpg?hash=11Y1wHCQhu)
![IMG_3804[1].JPG](/data/attachments/2996/2996686-2dfb9cf5f9a8b4ae5b7b4d2e14d52577.jpg?hash=Lfuc9fmotK)
![IMG_3803[1].JPG](/data/attachments/2996/2996685-8e25d69e119d61fb8f6e88d652d293f2.jpg?hash=jiXWnhGdYf)
![IMG_3802[1].JPG](/data/attachments/2996/2996684-db2ec668d67db9079cba87a424d58f4b.jpg?hash=2y7GaNZ9uQ)
![IMG_3815[1].JPG](/data/attachments/2996/2996688-5dbfa2f93c54f50109aa1c54ed82b648.jpg?hash=Xb-i-TxU9Q)
![IMG_3817[1].JPG](/data/attachments/2996/2996689-ecf38c667c664dfcc77537fa1adac176.jpg?hash=7POMZnxmTf)
![IMG_3818[1].JPG](/data/attachments/2996/2996690-185dd872e26bc5bdca9fd33730582ea9.jpg?hash=GF3YcuJrxb)


