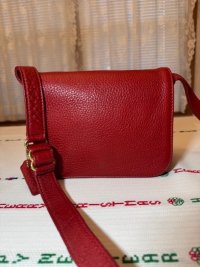
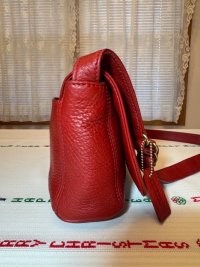
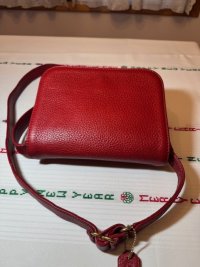
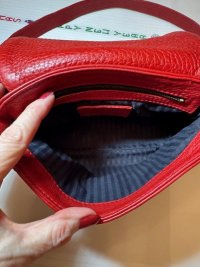
You can see before pics of the Tomato Red Sonoma Small Full Flap 4929 at the link below, and here are some after pics. I've also posted some pages from the 1997 Early Fall and Holiday Catalogs. I think that it's a really nice bag!
Before Pics:
After Pics:
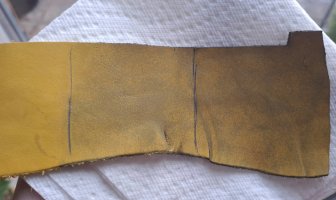
Before Pics:
After Pics:
Attachments
-
 Sonoma_4929_After_001.jpg81.3 KB · Views: 13
 -
 Sonoma_4929_After_002.jpg94.8 KB · Views: 9
 -
 Sonoma_4929_After_003.jpg65.1 KB · Views: 9
 -
 Sonoma_4929_After_004.jpg74.8 KB · Views: 10
 -
 Sonoma_4929_After_005.jpg83 KB · Views: 13
 -
 Sonoma_4929_Early_Fall_1997.jpg202.8 KB · Views: 15
 -
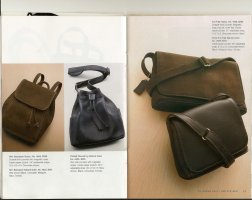 Sonoma_4929_Early_HolidayPreview_1997.jpg218.8 KB · Views: 13
Last edited:

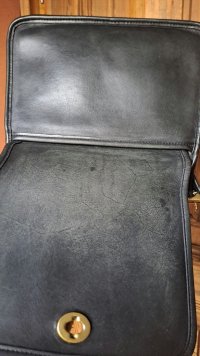
 Maybe cost me $2.00. It's a New York City basic bag. No strap. Added unfortunate item...a hardened steel padlock on the side with no key. Where there's a rehab will, there's a way. I went and bought bolt cutters!