Coach Rehab and Rescue Club

TPF may earn a commission from merchant affiliate
links, including eBay, Amazon, and others

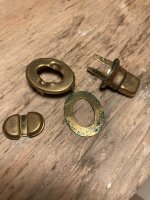
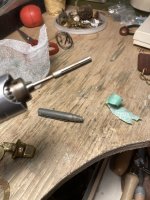
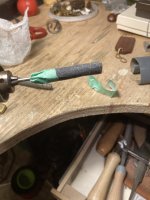
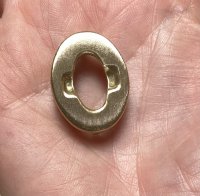
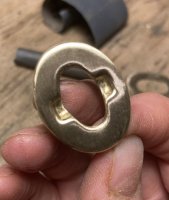
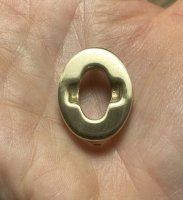
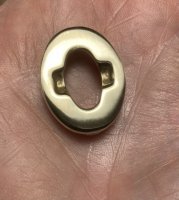
I’m coming from a jewelry background so I might approach it differently. First I clean it with vinegar to remove any verdigris, then a quick polish with Brasso. I use a jeweler’s drill (similar to a Dremel). I use a small section of a knitting needle (3”) and wrap some sandpaper around it secured with tape. I use various grits of waterproof sandpaper 180, 220, 400 & 600. Start with the 180 and end with the 600. Each time you change the grit, change the direction you are sanding in. Before you move on to the next finest grit, make sure you can’t see scratches. It actually goes pretty fast once you get the hang of it. You’ll end up with a not quite mirror finish.
To clarify, the sandpaper wrapped knitting needle is inserted into the end of the Dremel like any other attachment.
 
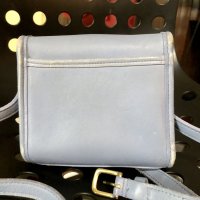
Well, I think I've done all I can for my hippie. It's not perfect by any means. The crease on the flap is making me a little crazy, but the upper corner of pocket underneath is very stiff and causing the flap to keep bending. There are some stains on the leather, some unevenness to the color throughout, and, of course, my cracked corners. But it's got that distressed look I wanted and the leather is in much better shape, so I'm a happy camper.

I did probably a 20 minute soak with dawn and hot water, scrubbed with a tooth brush, then rinsed. When it was still damp, I did two coats of leather therapy (maybe 4 on the corner cracks). I then did an unknown number of coats of CPR (it was a lot), again with extras on the corners. I touched up the areas where the edge coating was cracked/missing the best I could with leather paint, and then did one coat of blackrocks.

I forgot to take my own before photos, so I'm just going to take them from the listing.

Before:
View attachment 5090282
View attachment 5090284

After:
View attachment 5090290
View attachment 5090291

Thanks for all the advice throughout this process!
Thanks for posting! After several years of exploring vintage Coach, I am honing in on and looking at few styles, that may suit my daily needs as forever bags and this is one of them. You did an amazing job!
Hello,

I am considering purchasing Wilis bag from Ebay however from the picture it looks like it has a big wear stain in front of the bag. Do you guys think dunking and little bit (or a lot lol) leather CPR would fix this? I saw you guys performing almost magic on some of the bags showcased here on this forum.

Thank you
From my rehab experience, I am not sure that stain will completely go away. However, with cleaning and conditioning, as has been mentioned, the overall appearance of the bag will improve and if the stain does not go away completely, it may be less noticeable. I would offer the suggestion to think about two things: One, how you would feel if you could still see some some part of this stain after cleaning and conditioning? Some of us would be bothered by certain imperfections and some of us would be fine. Two, how you feel on the amount of money you are spending if you could still some some part of this stain after cleaning and conditioning? If the bag is not expensive by all means, it could be a good bag to learn on.
I tend to be forgiving of certain imperfections. I will often buy a bag with minor imperfections that I am not sure will improve, because the price is right and because my bags are, working breeds and are subject to scratches, raindrops and minor travel mug and other freak incidents in their daily use :lol: I have bought cheap bags simply to see if they could improve or how much they would improve.
I have have been pleasantly surprised by what has cleaned up on some of my bags. Some bags come out exactly as anticipated and others, well I have a few turkeys in my pile ;) or that donated to my favorite charity thrift shop.
Good luck and for what it's worth, the Willis is not a hard to find style.
 
Last edited:
Well, I think I've done all I can for my hippie. It's not perfect by any means. The crease on the flap is making me a little crazy, but the upper corner of pocket underneath is very stiff and causing the flap to keep bending. There are some stains on the leather, some unevenness to the color throughout, and, of course, my cracked corners. But it's got that distressed look I wanted and the leather is in much better shape, so I'm a happy camper.

I did probably a 20 minute soak with dawn and hot water, scrubbed with a tooth brush, then rinsed. When it was still damp, I did two coats of leather therapy (maybe 4 on the corner cracks). I then did an unknown number of coats of CPR (it was a lot), again with extras on the corners. I touched up the areas where the edge coating was cracked/missing the best I could with leather paint, and then did one coat of blackrocks.

I forgot to take my own before photos, so I'm just going to take them from the listing.

Before:
View attachment 5090282
View attachment 5090284

After:
View attachment 5090290
View attachment 5090291

Thanks for all the advice throughout this process!

You did a wonderful job! It looks so much better!
 
How would you repair the stitching on this bag?

I recently picked up a black Willis that was made in Turkey in 1998 at a good price and it is in pretty good shape except for one major issue.

The stitching is ripped on both sides where the flap attaches to the dowel rod, see picture below. I have occasionally sewn up a couple of loose/missing stitches on a few bags and it worked okay, but it was hard work and I don't know if my limited skills are up to this major challenge.

What do you think? Should I take it straight to the Cobbler and ask to have it sewn professionally or should I first try to repair it myself?

If you've ever done a major sewing rehab on a leather bag, how would you advise me to proceed? Please be specific - what type of thread, needle, and tools would you use? Would you start at the ends and work toward the middle or vice versa? Would you try to glue it before you start stictching to hold it in place?

Help! And thanks in advance for your advice!


View attachment 5090573
I would take it to a cobbler! I did the same type of sewing on my Post Pouch on just one side and it was sooooo hard to get the needle straight through. There’s some sort of hard layer (maybe plastic?) in between the leather layers that you need to get the needle through as well, or at least there was on my Post Pouch.
 
How would you repair the stitching on this bag?

I recently picked up a black Willis that was made in Turkey in 1998 at a good price and it is in pretty good shape except for one major issue.

The stitching is ripped on both sides where the flap attaches to the dowel rod, see picture below. I have occasionally sewn up a couple of loose/missing stitches on a few bags and it worked okay, but it was hard work and I don't know if my limited skills are up to this major challenge.

What do you think? Should I take it straight to the Cobbler and ask to have it sewn professionally or should I first try to repair it myself?

If you've ever done a major sewing rehab on a leather bag, how would you advise me to proceed? Please be specific - what type of thread, needle, and tools would you use? Would you start at the ends and work toward the middle or vice versa? Would you try to glue it before you start stictching to hold it in place?

Help! And thanks in advance for your advice!


View attachment 5090573
I'm really interested in learning how you end up fixing this. I have an aubergine Willis that needs to be re-stitched.
 
Right now there is a leather novelty strap on sale for $20 at the Coach Outlet online. The style number is 68198 and the color code is V5 and Oxblood. So I think that it has dark pewter hardware with oxblood leather. It's an adjustible crossbody strap and it is "almost gone".

It looks like a thin strap and that color combination won't match a lot of bags, but it could look nice with some bags. I think it would probably go well with a black, blue, navy, or green bag that has silver hardware. It might be tricky to try and match it to a red or oxblood bag - but maybe it would work.

I just wanted to mention it because replacing lost straps can be difficult and this is a good price for a new, genuine leather coach strap. you can always return it if it doesn't look good with your bag.

 
Last edited:
To clarify, the sandpaper wrapped knitting needle is inserted into the end of the Dremel like any other attachment.
Here’s some pictures of the process. When polishing jewellery, I usually get impatient and default to a brushed finish. For some reason I have a lot more patience with purse jewellery. I take the IKEA approach and spend most of my efforts on the visible parts. Anything that won’t be seen, I’m just mostly concerned that it’s clean with no verdigris. You can see it getting smoother as I go up with the finer grit.

597CC03A-6CD8-4996-B908-D2BB975108E8.jpeg

E3DFE351-2341-46B1-8C1A-57C35D6D22F4.jpeg

1998F178-A3F7-4ED1-AB25-07E994A95A6F.jpeg

B8CFC7C9-A556-40D6-A6C8-54E5B48E9EF5.jpeg

D6382E56-FF0C-4B42-8687-6705320D57C8.jpeg

2887F348-FEAE-4502-8D7D-92BBA80900AD.jpeg

504B4E43-5B09-4282-899E-7B3770DBFF0E.jpeg
 
Were you going very hard with the steel wool? I use the same (0000 + Brasso) and don't get scratches. I was using Cape Cod cloths until I got the Brasso and I haven't looked back. I only use Cape Cods for nickel now.

I wasn't aware we could use Mag's on nickel! Thanks for this! :flowers:

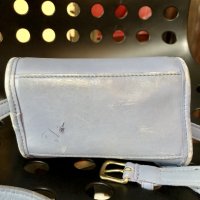
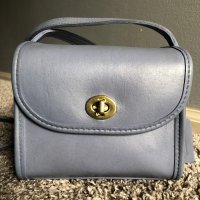
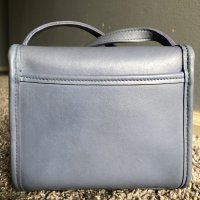
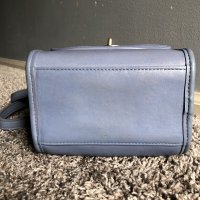
Okay, I’m calling the periwinkle Emmie done! I could probably do a little more color refreshing on the bottom, and it’s still a little tacky from the Blackrocks (I noticed some carpet fibers stuck to the front in the after pictures :lol:), but I’m done working on it!
Before:
View attachment 5091079View attachment 5091080View attachment 5091082
After:
View attachment 5091083View attachment 5091084View attachment 5091085

It looks gorgeous! :loveeyes:
 
Okay, I’m calling the periwinkle Emmie done! I could probably do a little more color refreshing on the bottom, and it’s still a little tacky from the Blackrocks (I noticed some carpet fibers stuck to the front in the after pictures :lol:), but I’m done working on it!
Before:
View attachment 5091079View attachment 5091080View attachment 5091082
After:
View attachment 5091083View attachment 5091084View attachment 5091085

Looks AMAZING! You did a fantastic job on the color and the corners!
 
Okay, I’m calling the periwinkle Emmie done! I could probably do a little more color refreshing on the bottom, and it’s still a little tacky from the Blackrocks (I noticed some carpet fibers stuck to the front in the after pictures :lol:), but I’m done working on it!
Before:
View attachment 5091079View attachment 5091080View attachment 5091082
After:
View attachment 5091083View attachment 5091084View attachment 5091085

It looks amazing even the bottom looks fantastic, congratulations!
 
Here’s some pictures of the process. When polishing jewellery, I usually get impatient and default to a brushed finish. For some reason I have a lot more patience with purse jewellery. I take the IKEA approach and spend most of my efforts on the visible parts. Anything that won’t be seen, I’m just mostly concerned that it’s clean with no verdigris. You can see it getting smoother as I go up with the finer grit.

View attachment 5091071

View attachment 5091072

View attachment 5091073

View attachment 5091074

View attachment 5091075

View attachment 5091076

View attachment 5091077

Wow, that looks great!
 
Welcome! I don't have a Willis so can't advise on dowel but for most rehabs I would definitely say dunk + CPR whilst damp and finish with Renapur (or Blackrock) and buff, which should be enough for your bag as it doesn't look particularly parched so shouldn't need a really intense conditioner like LT. Yes, vinegar for the smell.
Thanks! Ok, going to take the plunge this week using these recs. Oh, and I decided to mend first just in case.
 
Last edited:
Top