Coach Rehab and Rescue Club

TPF may earn a commission from merchant affiliate
links, including eBay, Amazon, and others

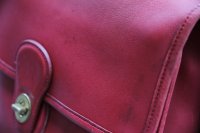
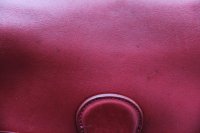
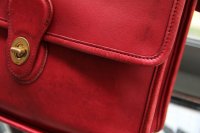
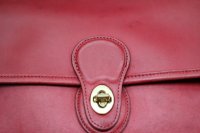
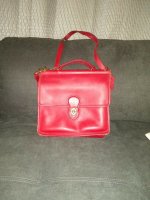
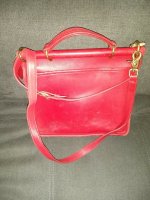
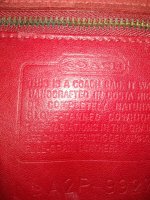
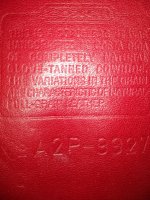
I always wanted to get a vintage Coach bag so I was really happy to find this City bag at Goodwill (about $20, which I think was fair). It was made in Turkey in June 1998. I love how it feels!
View attachment 4448665 View attachment 4448666

I've been following this thread since I acquired the bag, and I cannot wait to clean it. It's quite inspiring and motivating to see what everyone is doing to restore their bags! I want to document this whole process since I've never done something like this, so I am taking a few pictures for fun. I'm waiting on the Blackrock Leather conditioner I ordered to start, which should arrive next week.

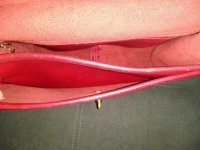
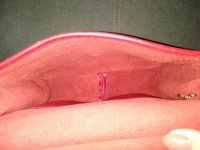
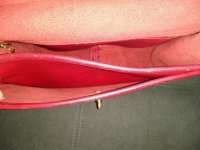
The top of the bag has a rougher texture than the flap which I don't really know if it can be softened. It needs quite a bit of cleaning inside the bag; there's some broken glass/plastic in the zippered pocket, among hair and small pieces of scrap.
View attachment 4448672 View attachment 4448695 View attachment 4448690

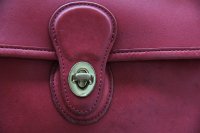
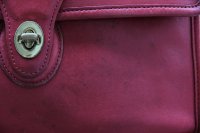
There's some verdigris on the locks and on the leather: it's inside so it isn't really visible at least. I'm wondering what's the best way to tackle the hardware; will it ever look solid without any scratches? I'm not sure how much polish will be needed or if it's just going to make the scratches worse. I tried the magnet trick to see if it's plated or solid: it seems to stick on the lock itself, but not on the hardware on the flap (maybe there's just not enough solid metal to "stick"). I read bags from the 90s were likely plated brass.
View attachment 4448673 View attachment 4448686 View attachment 4448674 View attachment 4448675

Also, you mentioned Blackrock.

Do you have Leather CPR already, or planning to get it, too?
 
Thank you for the warm welcome!

I was debating if it was worth it to get it. I was thinking a bath should be enough on its own with the Blackrock conditioner, but now I'm questioning it! I might pick it up at my local Bed Bath & Beyond later.

Let the seasoned rehabbers comment first, but I believe it's necessary.

Something I learned (by trying) when I just started with this: don't expect similar results to what you see here, unless using products that people use here.

We're very fortunate that the experienced rehabbers have done the heavy lifting, and taken the brunt of the risk, by experimenting on their own bags, and that they generously share that wisdom in this community.

Hahaa, I happen to be on the way to Bed Bath and Beyond right now to pick up some more Leather CPR, because I have bags coming next week and don't want to start without enough of it.

And anyways, you might have other leather items you could use it on. So if you only rehab the one bag, it could still be useful.
 
Alright, people. Ignore my last question above, I'm equipped with the right info now!!

(I don't know how to delete the post, so posting this update instead.)
By the way, I don't believe posts can be deleted, according to one of the owners of the site, as it is problematic to based on how the site is set up. But if you decide shortly after you post you would like to change or delete the content, you can. It took me a while to figure it all out.
You do have a small window of time to edit your posts, I believe around an hour. So if you decide within that time frame you would like to delete what you posted. Hit the EDIT in the bottom left of your post, if you are on a desk top or tablet, and on my phone, I have to hit More in the bottom right of the post. A pop up will open, then simply change or delete what you wrote. You must have at least one character, as you cannot have an "empty" post. The save your changes. That is why you will see a post with NM, or a punctuation mark or a smiley face, etc.
 
Last edited:
By the way, I don't believe posts can be deleted, according to one of the owners of the sight, as it is problematic to based on how the site is set up. But if you decide shortly after you post you would like to change or delete the content, you can. It took me a while to figure it all out.
You do have a small window of time to edit your posts, I believe around an hour. So if you decide within that time frame you would like to delete what you posted. Hit the EDIT in the bottom left of your post, if you are on a desk top or tablet, and on my phone, I have to hit More in the bottom right of the post. A pop up will open, then simply change or delete what you wrote. You must have at least one character, as you cannot have an "empty" post. The save your changes. That is why you will see a post with NM, or a punctuation mark or a smiley face, etc.

Thanks SO much for letting me know! I really appreciate it. :smile:
 
Thank you for the warm welcome!

I was debating if it was worth it to get it. I was thinking a bath should be enough on its own with the Blackrock conditioner, but now I'm questioning it! I might pick it up at my local Bed Bath & Beyond later.

Let the seasoned rehabbers comment first, but I believe it's necessary.

Something I learned (by trying) when I just started with this: don't expect similar results to what you see here, unless using products that people use here.

We're very fortunate that the experienced rehabbers have done the heavy lifting, and taken the brunt of the risk, by experimenting on their own bags, and that they generously share that wisdom in this community.

Hahaa, I happen to be on the way to Bed Bath and Beyond right now to pick up some more Leather CPR, because I have bags coming next week and don't want to start without enough of it.

And anyways, you might have other leather items you could use it on. So if you only rehab the one bag, it could still be useful.
I agree, Blackrocks isn't enough. It is if you aren't dunking the bag. If you dunk, you'll need a heavy duty conditioner like CPR to restore the moisture lost in the bath, even the bag is in good condition.

I'm reasonably sure your hardware is just plated. It probably had a protective coating at one time to prevent tarnishing. Deep scratches on hardware won't go away. It's important to get rid of the verdigris so it doesn't spread. The turnlock is replaceable if you don't like the way it comes out.
 
@nursebetty Thanks so much! And curious about a couple of things you mentioned!
When you use cardboard (or foam core), do you wrap it with Saran Wrap, and/or towels, or anything?

Burnishing? Do tell me more please? :smile: I've seen the term burnishing, and re-burnishing, when it comes to strap edges. I've looked up how it's done when it comes to leatherworking, with a new leather item. I don't have a good idea of what it entails when it comes to vintage Coach.

You lucky duck, finding this new. An Etsy find, or somewhere else?


Thanks!!
:girlsigh: I really want a nice Court.
I found it on ebay, and I see bags come up for sale occasionally that are in 'like new' or 'unused old stock' but they are a bit pricey. This was a 'treat' bag that I splurged on. I think it was over 100.00 plus shipping, but I often end up spending between 50 and 70 on a bag that needs lots of work anyway (because I live outside of the U.S.) so I went for it.

This is going to sound bonkers, but if I'm trying to shape a bag while drying I make 2 sets of cardboard templates. When the first set gets soft and no longer effective, 1 switch to the 2nd set. Usually this is day 2 or 3 of drying. I don't use any plastic wrap because I want the moisture to evaporate. I think cardboard works better for me than towels alone on the bag's flat planes. Just don't stuff things too tightly (I would be worried about stressing the seams).

For edge burnishing, I am basically just buffing quickly with extra Blackrocks, but I use a folding bone or similar flat smooth object. I do this after painting and sanding because the sanding smooths out the edge paint for me but leaves a dull finish. Glossy acrylic can restore the sheen but then you're back to needing to sand again unless you're a smooth painter ( I am not).

Honestly, you don't need to do all of these steps unless you really feel like fiddling - I think the conditioning and Blackrock's make the biggest impact. :smile:
 
Last edited:
  • Like
Reactions: Ava_13579
I found it on ebay, and I see bags come up for sale occasionally that are in 'like new' or 'unused old stock' but they are a bit pricey. This was a 'treat' bag that I splurged on. I think it was over 100.00 plus shipping, but I often end up spending between 50 and 70 on a bag that needs lots of work anyway (because I live outside of the U.S.) so I went for it.

This is going to sound bonkers, but if I'm trying to shape a bag while drying I make 2 sets of cardboard templates. When the first set gets soft and no longer effective, 1 switch to the 2nd set. Usually this is day 2 or 3 of drying. I don't use any plastic wrap because I want the moisture to evaporate. I think cardboard works better for me than towels alone on the bag's flat planes. Just don't stuff things too tightly (I would be worried about stressing the seams).

For edge burnishing, I am basically just buffing quickly with extra Blackrocks, but I use a folding bone or similar flat smooth object. I do this after painting and sanding because the sanding smooths out the edge paint for me but leaves a dull finish. Glossy acrylic can restore the sheen but then you're back to needing to sand again unless you're a smooth painter ( I am not).

Honestly, you don't need to do all of these steps unless you really feel like fiddling - I think the conditioning and Blackrock's make the biggest impact. :smile:

Thanks so much for letting me know!!

Small thing, but are those prices in USD, or CAD?

Interesting techniques!!

Hey, I’m happy to fiddle with things for better results. (I probably spent the equivalent of a couple of full days on my Willis, or more.)

Mind if I please ask a couple of things about your cardboard technique?

Do you use cardboard inserts for the pockets only?

Or do you use cardboard for the body of the bag? By cutting cardboard and assembling into a box-like shape that’s the size of the interior of the bag?

I believe that a lot of cardboard is dyed, to be that typical brown color. So I’m assuming this technique is for very dark-colored bags like mahogany or black.

Or have you used this for lighter-colored bags, and not had any issues with cardboard staining the suede?

About burnishing strap edges, please let me see if I understand correctly (and if not, please let me know)?

Step 1: Get out the strap. This process is for strap edges that are fuzzy and have lost color.
Step 2: Shave the fuzzy bits from the strap edges.
Step 3: Paint the edges.
Step 4: The edges are now rough, because the nappy leather has been coated in paint. So sand the edges.
Step 5: Edges are dull, so add glossy acrylic.
Step 6: Surface of edges may be uneven. If so, sand the edges.

By the way, you mentioned edge paint. May I ask what kind of paint you've used for this?

You also mentioned glossy acrylic. Is that glossy, pigmented acrylic paint? Or a clear top coat?

Hope you don't mind I'm asking for detail! I'm very curious about this.
 
Happy Weekend, everyone!

So, with the latest bag that I received, the eBay gods have not been kind to me.
When I received the bag, I took pictures, which are below.

A few things.

I'm surprised. I didn't intentionally get this bag in bad shape as a big project. Pictures looked good. No mention of issues.

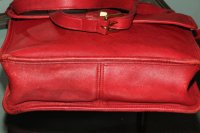
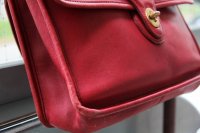
I knew there could be an issue with the bottom of the bag. (After I purchased, the seller let me know that there was some discolouration on the bottom, and wear on the corners. She sent some pictures of the bottom of the bag. Didn’t look awful. I saw light-colored areas, which I thought looked like scuffs. Figured they'd darken, or I'd use Saphir products on them.)

The bag was then cleaned and conditioned at a Coach store before it was shipped. So the bag has already been cleaned, and recently.

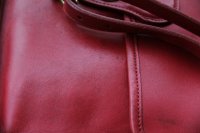
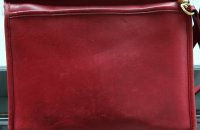
About the dark spots on the bag: many of these are pits in the leather. They’re not flat, but depressions in the bag.

The seller is in Hawaii. After receiving this bag, I searched purseforum for TPF members posting about mold. I got the impression that in Hawaii, mold is a big issue; apparently, because of the climate, it can quickly form on leather goods left in a closet for just a little while.

I haven't done anything to the bag. Received it, took pictures, and put it inside clear, double-bagged garbage bags. Because, ew. It's sitting in my living room right now.

Thoughts?
Anyone know what's wrong with this bag?
I've never seen mold on leather in person. Does anyone know if it would look like this?
A combination of issues?

(The bags looks very bad to me, and not really salvageable.)

Was really looking forward to this one.
=(

Body of bag incl. bottom (IMG_8334).JPG
White stuff (IMG_8309).JPG

Front lower part (IMG_8328).JPG
Back cropped (IMG_8321).JPG
Front right side -- IMG_8319.JPG
Front top (IMG_8318).JPG
Front around turnlockIMG_8317.JPG
Front at bottom right side (IMG_8316).JPG

Front right side (IMG_8306).JPG
Front around turnlock (IMG_8283).JPG
 
  • Like
Reactions: Aku_no_Hana
Happy Weekend, everyone!

So, with the latest bag that I received, the eBay gods have not been kind to me.
When I received the bag, I took pictures, which are below.

A few things.

I'm surprised. I didn't intentionally get this bag in bad shape as a big project. Pictures looked good. No mention of issues.

I knew there could be an issue with the bottom of the bag. (After I purchased, the seller let me know that there was some discolouration on the bottom, and wear on the corners. She sent some pictures of the bottom of the bag. Didn’t look awful. I saw light-colored areas, which I thought looked like scuffs. Figured they'd darken, or I'd use Saphir products on them.)

The bag was then cleaned and conditioned at a Coach store before it was shipped. So the bag has already been cleaned, and recently.

About the dark spots on the bag: many of these are pits in the leather. They’re not flat, but depressions in the bag.

The seller is in Hawaii. After receiving this bag, I searched purseforum for TPF members posting about mold. I got the impression that in Hawaii, mold is a big issue; apparently, because of the climate, it can quickly form on leather goods left in a closet for just a little while.

I haven't done anything to the bag. Received it, took pictures, and put it inside clear, double-bagged garbage bags. Because, ew. It's sitting in my living room right now.

Thoughts?
Anyone know what's wrong with this bag?
I've never seen mold on leather in person. Does anyone know if it would look like this?
A combination of issues?

(The bags looks very bad to me, and not really salvageable.)

Was really looking forward to this one.
=(

View attachment 4449715
View attachment 4449724

View attachment 4449726
View attachment 4449727
View attachment 4449729
View attachment 4449733
View attachment 4449734
View attachment 4449737

View attachment 4449738
View attachment 4449740
Unless you really want to do a major rehab, I would ask the seller to take it back, including your pics in the message. If she won’t do it, file a claim through ebay.

If you want to try to clean it, the mold cure is soaking in vinegar water, an expert will have to comment on how much to use. After that I would proceed with a full clean and condition at home. No way of knowing if the seller really took it to Coach for a clean and even if she did, Coach does a light clean, not a full soak and condition.
 
  • Like
Reactions: Ava_13579
I'm happy to share my experience, but there are so many more experienced rehabbers here. That being said here's what I did that I think worked for me.

Blocking out to dry:

I used acid-free cardstock on a light coloured bag because I had some from another project. I doubt it's necessary. Perhaps poster board from Dollarama, Michael's or the drugstore would work as well. I agree that dye would be a concern- perhaps get white or 'natural' and test for colour fastness first? Your bag looks good structurally and probably will dry in a good shape. My bag was warped and I was trying to force it back into shape. I did a rectangle inside the bag pressed along the bottom, one panel for back pocket and each edge ( Basically I made a loose box - it was a Willis) the stuffing with towels held the panels in place.

Strap edges:

I like cheapo artist craft or art store acrylic paint in a colour that closely matches the existing trim. I've used folk art and a student grade acrylic from Curry's. I have cut it with conditioner to apply, and cut with gloss acrylic to add sheen. No matter what I did, best results were with multiple light applications, rather than one heavy one. A light, quick sand with an emery board between coats worked for me. Hairy strap edges get a trim with tiny sharp scissors. I don't have a way to deal with hairy edges that I'm married to. Your bag edges look good. The acrylic, when applied in one direction will encourage hairy bits to lie flat.


Lately, I have been mixing a small jar of paint/ acrylic gloss/ leather CPR in the colour I need so that the consistency is loose paint ( not too drippy). I store with a tight- fitting lid. I can't give you ratios because you have to fiddle to get the look you want, but you can't mess up too badly. If it's too light or not glossy enough just adjust for another layer.

Somebody here used dye on their strap edges and it looks incredible!

I do think the brass here is solid, with a factory lacquer to prevent colour change/ verdigris, but I haven't tried to polish mine yet. If I do I will happily report. I think the metal bit is inside the turn mechanism, but get other opinions!

Finally, I think i probably paid 140.00 to 150.00 Canadian for my Navy Court! I know! Crazy pants expensive! The seller thought it was black too. It was a happy discovery that it was navy.
 
Last edited:
Top