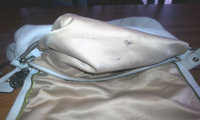
Frankentote has recovered from surgery! I am very pleased with my little patient. The kisslock has been reattached, and I just need to tweak a few things and get her leather back in tip-top shape.


Attaching the kisslock frame:
First tip - stretching the front side of the pocket while the leather was wet definitely helped. It gave me a little more to trim off at the top so I could be sure the holes were hidden under the frame. Use a good pair of scissors for trimming - I finally got to try these new ones from Fiskars - they are awesome - I could easily cut off a thin sliver of leather when I was fine tuning the fit. (And FYI - I used to work for them, but that didn't influence my opinion!) Just trim off a small strip at a time and keep checking the fit - remember, if you take off too much you can't put it back!

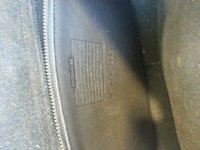
Make sure you open up the frame on the kisslock wide enough so you don't have to fight to slide the leather in - it saves a lot of time in the long run. I started by inserting a screwdriver parallel with the frame and then gently twisting it to force the sides apart, but it is putting tiny dents in the frame that you could see from the front. I switched over to a pair of rounded pliers that were thin enough to slide in, then I just gently twisted them (because they were wider in that direction, kwim?). Just be gentle, and work your way along the entire length of both sides of the frame. I did this a couple of times, just working it apart a little on the first round, then a little farther on the second round.

Once you've get the frame in place, you'll need to crimp it closed. I need something that would have an opening in the middle, because I didn't want to smash the curved side of the frame, I just wanted to squeeze the bottom edges. I chose the pliers in the middle.

They were a little hard to use on the back piece of the pocket, but I managed to wedge them in. I placed some chipboard strips between the pliers and the frame to protect it from scratches. I tried to use gentle pressure to squeeze the edges together, and worked my way down the length of the frame. Once you're done, if the frame won't close properly that means you don't have it crimped together enough somewhere. It's much easier to crimp the frame onto the back side of the pocket first, then do the front because you have more room to maneuver the leather into the frame. Sorry this has been such a novel! Feel free to pm me if you have questions!