Let me see what I can do to help.
For starters, I will say I am not that familiar with the Sony line of SLRs but an 18-55 kit lens tends not to open up wide. See my tips above to understand a little of that. If you could shoot wider open, you would let more light in.
Location is important. So move off the bed - and move near a window - and watch for the light coming in. Position the purse based on that light. See my collection shots, which I think you have seen before, and then watch where the light comes in and how I have the purses angled. You can see based on position if the product is front lit, side lit or back lit.
For the red cosmetic bag - TURN FLASH OFF. The bright spot is the flash. Again - get near a window.
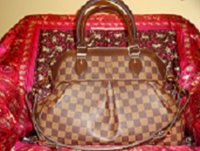
The Damier Azur purse needs more light - not flash, but actual light. The second one of it, the flash trails off so parts in back are darker.
Does this help at all? Once you get the photo closer in camera, by trying to get better light, consider a few other lenses. Again not super familiar with Sony, but Canon and Nikon have great 50mm and 85mm lenses - I'd see if you can find a "prime" lens in a 50mm. This means it does not zoom - you will need to zoom with your feet. If you knew that already, I apologize, but this info can benefit all who read. And if you did not, it is good to know.
Also, eventually it will benefit you greatly to shoot in Manual or at minimum, aperture priority.
I help people all day long learn photography and editing, and a few guessed who I am in professional life, though I plan to try and keep it rather separate. But I know you are not a lost cause, and while good equipment helps, the photographer is far more important than the gear. So we will get you there. Start by finding a big open window. Oh - or get some foam core board and go in a garage - garage light is great too.
Jodi
oh this is great. i have been trying to take expert photographs but it is just not working for me. i hav a sony a33 with the kit lens and an addl. portrait lens as well. i am wondering if the issue with my pics is an addl flash thats needed. quite frankly i just want to know what is my next thing i need to buy for my camera to take great pics:
flash
lens (which one)
or is it just a setting i dont know how to use
here are some of my pics
notice the dark part at the bottom
no flash
with flash
dirty mirror glare
and another
sometimes i think i take better pics with my phone


