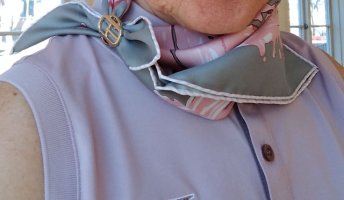
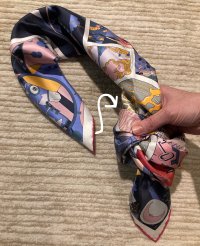
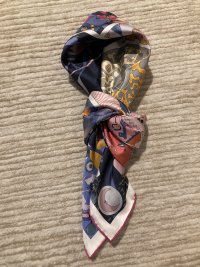
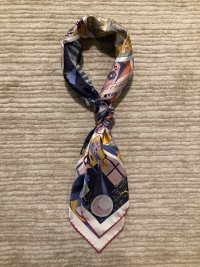
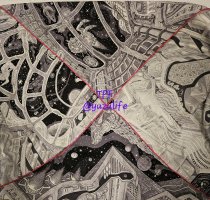
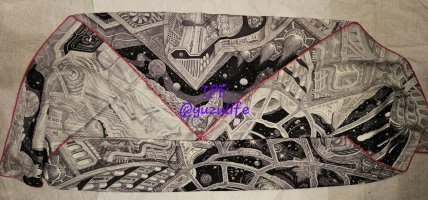
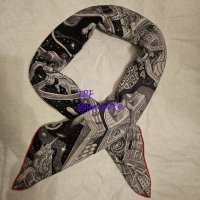
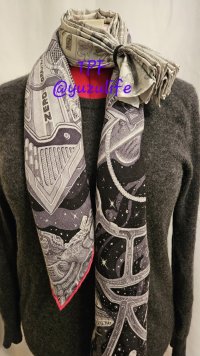
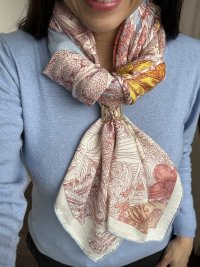
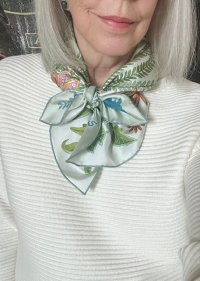
You just fold the scarf in half diagonally so that it makes a triangle. Then add a scarf ring of your choice to one of the folded over corners, and tie it in back (I double knot it). Slide the scarf ring up or down to where it looks nicest and voila! I like the asymmetrical look, and it shows off a lot of the scarf details this way.Do you mind explaining how you tied/draped this so beautifully?
You are using an out of date browser. It may not display this or other websites correctly.
You should upgrade or use an alternative browser.
You should upgrade or use an alternative browser.
Scarves The How-To Guide for Scarves!!!! NO CHATTER!
- Thread starter jag
- Start date
TPF may earn a commission from merchant affiliate
links, including eBay, Amazon, and others
More options
Who Replied?Thank you! Here is the link to the YouTube video I used as a reference. I opted for the second example.You look absolutely stunning in your outfit! Can I ask you how you tied the scarf to look so fantastic? Thank you!
Has anyone gotten to play with the Mini Boucle twilly ring?

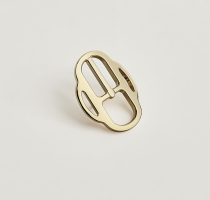
It's called a twilly ring, so obviously small, but one of the modeling shots has it used with a 90 (albeit, with only a small amount of fabric through the ring., so I'm wondering if it might be used with a variety of sizes. Has anyone tried it on? It's not in stock at a boutique near me, but I'm intrigued by the tying possibilities with the multiple openings.


It's called a twilly ring, so obviously small, but one of the modeling shots has it used with a 90 (albeit, with only a small amount of fabric through the ring., so I'm wondering if it might be used with a variety of sizes. Has anyone tried it on? It's not in stock at a boutique near me, but I'm intrigued by the tying possibilities with the multiple openings.
Here is my Mini Boucle Twilly ring onHas anyone gotten to play with the Mini Boucle twilly ring?
View attachment 5815887 View attachment 5815888
It's called a twilly ring, so obviously small, but one of the modeling shots has it used with a 90 (albeit, with only a small amount of fabric through the ring., so I'm wondering if it might be used with a variety of sizes. Has anyone tried it on? It's not in stock at a boutique near me, but I'm intrigued by the tying possibilities with the multiple openings.
90 cm silk twill. Two ends and one end
70 mousseline
45 gavroche
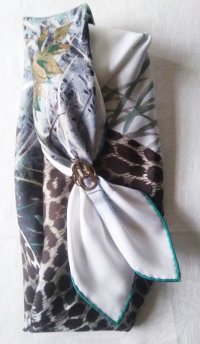
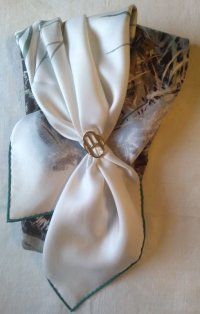
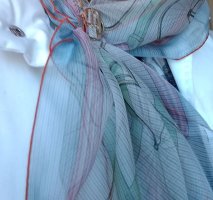
Last edited:
Archive shot of this twilly ring, even though it’s a 140 it works well due to the thinness of the mousseline.Has anyone gotten to play with the Mini Boucle twilly ring?
View attachment 5815887 View attachment 5815888
It's called a twilly ring, so obviously small, but one of the modeling shots has it used with a 90 (albeit, with only a small amount of fabric through the ring., so I'm wondering if it might be used with a variety of sizes. Has anyone tried it on? It's not in stock at a boutique near me, but I'm intrigued by the tying possibilities with the multiple openings.
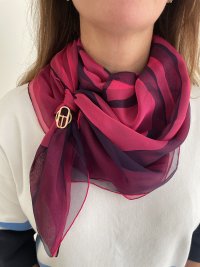
FWIW, a simple ‘men’s tie’ arrangement:
1. Start with scarf in bias fold:
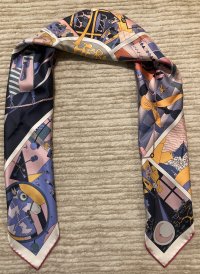
2. Pick one side and begin looping it around itself…

3. … as you pull it through from the back, twist the scarf so that the ‘front’ side is up. Keep the resulting knot loose at first.
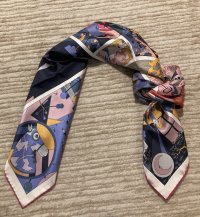
4. Pull the other side of the scarf through the back of that loose knot:
At which point you will have:
5. And then pull on the top and bottom of the side with the knot to tighten, and to adjust the knot up and down as needed:
Et voila!

1. Start with scarf in bias fold:

2. Pick one side and begin looping it around itself…

3. … as you pull it through from the back, twist the scarf so that the ‘front’ side is up. Keep the resulting knot loose at first.

4. Pull the other side of the scarf through the back of that loose knot:

At which point you will have:

5. And then pull on the top and bottom of the side with the knot to tighten, and to adjust the knot up and down as needed:

Et voila!

What size scarf is this? Thanks!
This is a 90.
Hi all! Here's a short tutorial for the knot I made with Pantin City today. Just one way to do it!
1. Start with Bias Fold
2. Fold in half and drape around your neck (Photo 1)
3. Make a small cross tie in the end with two tails (Photo 2)
4. Draw one tail of the tied end through the half fold (Photo 3)
5. Tie off twice and adjust (Voila!)
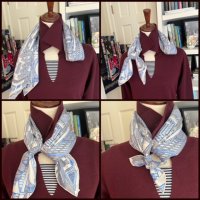
Basically, it is the Echidna knot with no Chain d'Ancre Ring-- the scarf creates the ring!
1. Start with Bias Fold
2. Fold in half and drape around your neck (Photo 1)
3. Make a small cross tie in the end with two tails (Photo 2)
4. Draw one tail of the tied end through the half fold (Photo 3)
5. Tie off twice and adjust (Voila!)

Basically, it is the Echidna knot with no Chain d'Ancre Ring-- the scarf creates the ring!
Last edited:
Here is a little tutorial (requested by @GloWW0rM) for the "Leaf Knot" I showed with my CSGM Mythiques Phoenix Coloriage on SOTD Wednesday 10/18.
To give proper credit, I learned this knot second, third or fourth hand from an Instagrammer called @initirkinina. I do not know the original link nor what she herself calls this or even if it is an accurate recreation! But I think it is nice for CSGMs that have corner details to feature...and also to make a shorter tie.
Step 1: Bias Fold looped around neck (first photo)
Step 2: Take the two long tails and loop through center as shown (top row, pic 2)
Step 3: Pull the tails through the loops as shown so you have this result (top row, pic 3)
Step 4: Tie the hanging tails together, make a knot (2nd row, pic 1) Note: there will be a small space in the center.
Step 5: Pull the two tied tails up *behind* and through the small space (2nd row, pic 2)
Step 6: Gently coax the "leaves" out and adjust.

Happy knotting, dear Scarfies!
To give proper credit, I learned this knot second, third or fourth hand from an Instagrammer called @initirkinina. I do not know the original link nor what she herself calls this or even if it is an accurate recreation! But I think it is nice for CSGMs that have corner details to feature...and also to make a shorter tie.
Step 1: Bias Fold looped around neck (first photo)
Step 2: Take the two long tails and loop through center as shown (top row, pic 2)
Step 3: Pull the tails through the loops as shown so you have this result (top row, pic 3)
Step 4: Tie the hanging tails together, make a knot (2nd row, pic 1) Note: there will be a small space in the center.
Step 5: Pull the two tied tails up *behind* and through the small space (2nd row, pic 2)
Step 6: Gently coax the "leaves" out and adjust.

Happy knotting, dear Scarfies!
Last edited:
I use the first knot in this video to show the middle area/design of scarves... @BlueLilac this is how I tied my Robe Legere 

How to guide for a double scarf bow & knot:
1. Gather 1 cashmere-silk (100 or 140), 1 smaller format silk (45 or 60), and 1 hair tie
2. Start by accordian-folding the smaller format silk

3. Wrap around neck, slightly off center, and secure ends with hair tie

4. Fold the CS using the bias fold technique
5. Off center wrap the long end of the CS around the neck going over the smaller format silk

6. Wrap the CS end under the smaller format fan to tie the CS ends together once.
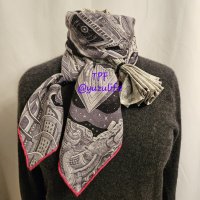
7. Make a bow with the CS ends

8. Now fluff the bow and fan!
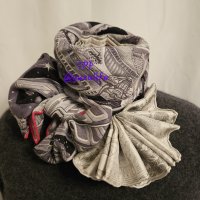
Ta-da!
1. Gather 1 cashmere-silk (100 or 140), 1 smaller format silk (45 or 60), and 1 hair tie
2. Start by accordian-folding the smaller format silk

3. Wrap around neck, slightly off center, and secure ends with hair tie

4. Fold the CS using the bias fold technique


5. Off center wrap the long end of the CS around the neck going over the smaller format silk


6. Wrap the CS end under the smaller format fan to tie the CS ends together once.

7. Make a bow with the CS ends

8. Now fluff the bow and fan!


Ta-da!
Dear @Jereni, here you have
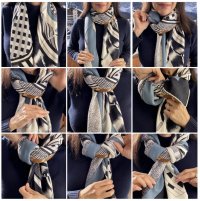
1. Start with a Bias Fold.
2. Loop the scarf around your neck.
3. Pull both tails through the loop.
4. Continue pulling the tails to secure the loop.
5. Adjust to ensure the loop sits comfortably.
6. Repeat the process: Pull both tails through the loop again.
7. Continue to secure the second loop.
8. Adjust the second loop for symmetry and comfort.
9. Finish off with a scarf ring for an extra touch, or leave as is for a casual look


@MAGJES I think you shared this the other week - first of all I love the styling but also - would you mind sharing how to do this knot? Thanks either way!


@Jereni this tutorial shows best how to knot this scarf. I’ll do a step by step when I get a chance.
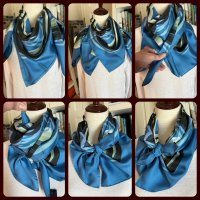
As requested, here is a step by step for the knot I posted with Jardin des Peintres and En Liberté! this week on tPF SOTD.

Not sure what this can be called-- I just think of it as a split-tail cowboy knot! Please note that this tie works best with double-face scarves or scarves where the reverse side looks almost as saturated as the front, since you will be showing the underside (wrong side) of the bottom triangle when you separate it.
1. Start with a triangle fold
2. Separate the sides of the center triangle
3. Bring the outer tails to the split in the triangle and cross as if to tie
4. Pass the top tail ( the one my thumb is on) under and behind to the top of the fold
5. Tie the tail I am holding at the top of pic 4 to the other tail (with the tag)
6. And done! Adjust by pulling one side or the other, make the knot smaller or larger, and if you want to make it more compact as I did in the first mod shot of Jardin, flip the whole thing over while on your neck to make it narrower.

Register on TPF! This sidebar then disappears and there are less ads!
