Refurb job

Angsas

O.G.
May 12, 2013
177
87
Good evening ladies!
I was recently lucky to snatch up this beautiful old girl for a steal from a local auction site [emoji5]
The leather doesn’t deny itself - it’s a 2007 City in gorgeous chevre!
The colour is Plomb. I was not familiar with this colour, but consulting this site, I learned that’s a charcoal grey. It looked almost a metallic brown in the photos - but I assumed it was from the light!
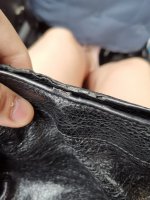
Listing pics:
IMG_2865.JPGIMG_2866.JPGIMG_2868.JPGIMG_2867.JPG

As the photos show, she was in a fairly rough condition. When she arrived, I realized the leather was so dried up and faded, that in fact, it has turned into a brownish hue!

To restore her, I started out by conditioning the leather really well. At first, it had a rough or even coarse surface from being so dry, but soon the surface regained its silkyness, and the colour deepened - just from being thoroughly moisturized!

The colour still had a brownish tone, though, I figure some of the pigments of the original dye had faded. I then applied tinted leather conditioners, one in a sheer black, and also a couple of coats of a dark blue where needed, to neutralize the copper undertones.

I then reapplied edge seal where it had gone. That just worked wonders to sharpen up her appearance!

And finally, I used a grey felt pen to touch up the colour of the whip stiches of the handles.....

And here she is: my beautiful girl brought back to her former glory! [emoji7]

IMG_2863.JPGIMG_2861.JPG
 
Last edited:
Wow great job! It looks really nice! A little tlc and she is shining nicely you did a great job at neutralizing the under tones. Those dark colors are great to be able to touch up! Did you use fieblings for the edge coat? Did you have to sand it down? Can we get a close up to the edgecoat repairs?

Great work!
 
What a successful rehab, and how rewarding to bring this girl back to her former beauty! Would you mind please sharing with us what products you used? Also it looks like you were able to smooth out the rough spots in the laces. Did you do anything in particular to accomplish that?
 
Thank you all so much!
I’ll try to answer all your questions, and share a few more photos of her!

Yes, she was in a worse condition than I’d imagined, although I knew the risk from the photos. But, I mean, that leather!! - is what made me go for it! And yes, with these darker colours, I think there’s less of a risk in getting an acceptable result.

Also, the way the leather just came right back to feeling thick and silky again, is just testimony to the quality of these bags.

The products I used for the conditioning was “B&E Lederfett”, one in neutral (that I emtied) and the same one in black. It may sound dramatic, but it goes on really sheer and it really more a tint than an actual “dye”.
The blue was simply a dark blue shoe polish, just applied very thinly and where needed. I was a little scared to try it, but it worked out fine.

I’ve been experimenting with different leather conditioners over the years, but for these softer leathers I find this one absorbs just beautifully

IMG_2876.JPG

For the edge coat I used this product (Fenice) - I never tried other brands, and I figure this bottle will last me a lifetime!

IMG_2875.JPG

For the edges themselves, I started out by glueing the layers back together where they had split, to get a nice “solid” surface.

I did think about sanding to get the edge surface smooth, but I was worried that it would rather roughen up those exposed edges, and in the end I went for a blade to kind of shave off any bumps ever so carefully!

I trimmed off a lot of stray hair fibers that were sticking out of the edges, especially at the handle bases. The “stubble” I melted away by quickly passing over a flame! (They’re some synthetic fibre)

Also, I applied a few coats of the edge coat, which also helped smoothen the finished surface. The finished result is a little hard to photograph, but hopefully you can get an impression from these photos!

The handle edges themselves were the biggest headache and the poorest result, because I didn’t want to remove the whip stiching to get a proper surface to work with. I was too scared I wouldn’t be able to put them back in place, let alone tieing those knots back up - which I figured would show up worse than a more uneven edge coat

IMG_2869.JPGIMG_2872.JPGIMG_2870.JPGIMG_2871.JPG

The fraying of the whip stiches was pretty bad towards the center of the handles, where they had had most wear.
I ended up very gently “combing” those fibers back in place, using the tip of a needle that I had dipped into some glue, just a tiny amount - then pressing it into the lace, so to speak. For now it looks and feels nice, but of course time will tell how durable that is ultimately going to be!

Here’s a few more photos, back and side view [emoji7]

IMG_2873.JPG
IMG_2874.JPG
 
Thank you all so much!
I’ll try to answer all your questions, and share a few more photos of her!

Yes, she was in a worse condition than I’d imagined, although I knew the risk from the photos. But, I mean, that leather!! - is what made me go for it! And yes, with these darker colours, I think there’s less of a risk in getting an acceptable result.

Also, the way the leather just came right back to feeling thick and silky again, is just testimony to the quality of these bags.

The products I used for the conditioning was “B&E Lederfett”, one in neutral (that I emtied) and the same one in black. It may sound dramatic, but it goes on really sheer and it really more a tint than an actual “dye”.
The blue was simply a dark blue shoe polish, just applied very thinly and where needed. I was a little scared to try it, but it worked out fine.

I’ve been experimenting with different leather conditioners over the years, but for these softer leathers I find this one absorbs just beautifully

View attachment 4344172

For the edge coat I used this product (Fenice) - I never tried other brands, and I figure this bottle will last me a lifetime!

View attachment 4344173

For the edges themselves, I started out by glueing the layers back together where they had split, to get a nice “solid” surface.

I did think about sanding to get the edge surface smooth, but I was worried that it would rather roughen up those exposed edges, and in the end I went for a blade to kind of shave off any bumps ever so carefully!

I trimmed off a lot of stray hair fibers that were sticking out of the edges, especially at the handle bases. The “stubble” I melted away by quickly passing over a flame! (They’re some synthetic fibre)

Also, I applied a few coats of the edge coat, which also helped smoothen the finished surface. The finished result is a little hard to photograph, but hopefully you can get an impression from these photos!

The handle edges themselves were the biggest headache and the poorest result, because I didn’t want to remove the whip stiching to get a proper surface to work with. I was too scared I wouldn’t be able to put them back in place, let alone tieing those knots back up - which I figured would show up worse than a more uneven edge coat

View attachment 4344176View attachment 4344177View attachment 4344178View attachment 4344179

The fraying of the whip stiches was pretty bad towards the center of the handles, where they had had most wear.
I ended up very gently “combing” those fibers back in place, using the tip of a needle that I had dipped into some glue, just a tiny amount - then pressing it into the lace, so to speak. For now it looks and feels nice, but of course time will tell how durable that is ultimately going to be!

Here’s a few more photos, back and side view [emoji7]

View attachment 4344180
View attachment 4344181

Thanks for the detailed photos! My Balenciaga Town 2015 is in need of some love as well. The top portion of the bag, similar to yours, has missing edge coat and I think I need to glue the flaps together as well. What kind of glue did you use?

Attaching a photo of my edges!
 

Attachments

  • IMG_20190831_153449.jpg
    IMG_20190831_153449.jpg
    155.2 KB · Views: 51
Thanks for the detailed photos! My Balenciaga Town 2015 is in need of some love as well. The top portion of the bag, similar to yours, has missing edge coat and I think I need to glue the flaps together as well. What kind of glue did you use?

Attaching a photo of my edges!


Hi Nutalia, I used just a regular water based paper/leather glue, it was not a speciality product.
My bag is still holding up very well after her little make over! Best of luck with your repairs, and would love to see some photoes when you’re done! ❤️