katev said:I used a sponge to apply it and I thought that the dye/conditioner mix was much easier to to use than acrylic paint, and I am pleased that it doesn't have that chalky look that you sometimes get with paint. But the color looks more "irridescent" than is typical of vintage coach bags. Maybe the shine will diminish over time.
One area of concern. The manufacturer claims that the dye will not rub off on hands or clothes and it did dry very quickly. But the last step in the process is to wipe it down with a soft cloth and I've just done that, and I got a faint blue tinge on the white cloth. But it may still be drying - I just applied the dye last night - so I will keep an eye on that issue for a few days.
Before I applied the dye I rewashed the bag in the washer in warm water to get all the conditioner and black rocks out of it, and I think that was a good idea.
The directions say to apply the dye straight out of the jar but I decided to mix it with leather cpr because the bag was so dry after washing (and Gallina said that she has mixed it with conditioner in the past.)
But I would do a few things differently if I did it over. The navy dye is brighter and more purple than Coach navy color. I would probably buy a jar of black and mix the two shades to get a darker navy blue. I may still do that and apply a second coat of dye.
I would also remove the turnlock hardware to make it easier to apply the dye. And I would wear disposable plastic gloves. I wore my new pair of kitchen rubber gloves and they were ruined. But it was easy to clean up the dye from other surfaces using plain water.
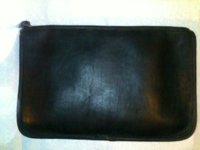
The first pic below is of the bag after I rewashed it to remove the conditioners and let it dry. The last 4 pictures are after I dyed the bag and I think it is a big improvement but not perfect. But at least I won't be afraid to dye a bag in the future if I think it is necessary!
She looks great!


 I decided to dye my old Coach pouch (?) which Hyacinth authenticated here: