Ok, so now it's Tuesday. We continue.
Bath was Saturday. Took the last paper towels out Sunday morning, and just let the bag sit, as last stated, since then.
Tuesday afternoon and it was completely dry. Stiff, but dry. (But as I said, it was stiff even before the bath. The bath may have contributed to the stiffness a little, but this leather was dry already when I first bought it.)
I actually did two conditionings today, because it just drank the conditioner in. I did the first conditioning early this afternoon, and the second conditioning just before dinner. I still think I have two conditionings yet to go ... that's my guess.
Ok, pics time ...
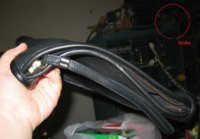
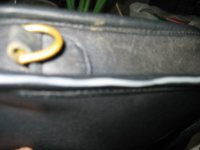
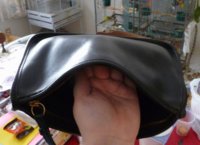
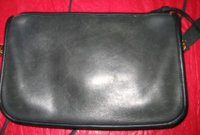
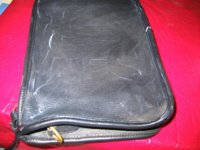
First pic ... As the bag looked when I first picked it up today. You can kind of see the stiffness in the "stiff waves" of the leather.
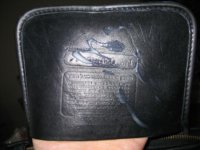
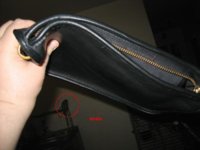
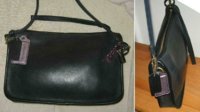
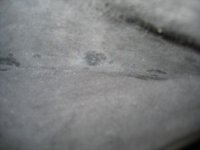
Second pic ... Inside the inner pocket, after bath and drying. That's where the melted candies had been. There's still a mark, but nothing like it started. And it does not feel sticky or anything to the touch. It's more of a color blemish than anything else.
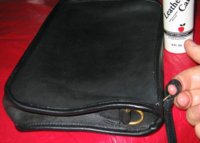
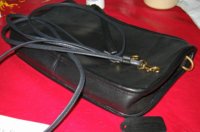
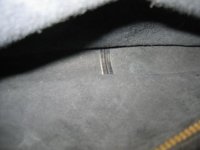
Third pic ... Inside of the main compartment. The one blemish that had been in there is much less visible. You pretty much had to know it was there to begin with, to pick it out now.
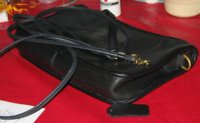
Fourth pic ... Starting on the first side with Apple conditioner.
Ok, I know bunny and hyacinth, off the top of my head, use Lexol. I've always stuck with Apple primarily because it seems nice and mild to me, and we're careful about what chemicals we use in our house. We have eight parrots, which I also handle daily. Birds are more sensitive, so we really do watch what chemicals we use. The Apple seems nice and "mild", rubs into the leather well, and I can wash it off of my hands easily with Ivory soap. I use my bare fingers to rub the Apple into the leather, and I've never felt like my hands were being harmed, hence making me think "nice and mild".
So anyway, that's why I've always kept with the Apple conditioner. Note, also, that Apple does have the biggest qualification for leather, and that is that it is silicon-free. Conditioner with silicon, from what I've read, is bad for the leather. So in sticking with Apple, I'm at least covering the "biggest base" for being healthy for the leather.
Ok, sorry for the ramble. Moving on ...
Fifth pic .... partially rubbed in.
Rubbing the conditioner in is really just like rubbing handcream into your own skin. (Or at least it is for me.) And I do use my bare fingers. I know some places have said you can use a cloth. Well to be honest, my hands have never felt any adverse effects from the Apple, so I just use my bare fingers. (If anything, my hands come out 'softer' too.)
And the other reason I use my bare fingers is that it's easier to really massage the conditioner into the leather.
Look at it this way ... leather is fibrous inside. That means that the main mode of transport for the conditioner to move deeper through the fibrous material, is capillary action accelerated by movement/compression. As the fibers move against each other, and are compressed then decompressed, the conditioner moves along, pulled also by the capillary action. Well the movement/compression/decompression, is you doing the rubbing. And that rubbing can be more "textured" ... deeper and more varied ... if I just use my bare fingers.
So yeah, it's bare fingers and Apple for the rest of these pics tonight.
Again, sorry for the ramble, but I'm trying to be thorough.
Bath was Saturday. Took the last paper towels out Sunday morning, and just let the bag sit, as last stated, since then.
Tuesday afternoon and it was completely dry. Stiff, but dry. (But as I said, it was stiff even before the bath. The bath may have contributed to the stiffness a little, but this leather was dry already when I first bought it.)
I actually did two conditionings today, because it just drank the conditioner in. I did the first conditioning early this afternoon, and the second conditioning just before dinner. I still think I have two conditionings yet to go ... that's my guess.
Ok, pics time ...
First pic ... As the bag looked when I first picked it up today. You can kind of see the stiffness in the "stiff waves" of the leather.
Second pic ... Inside the inner pocket, after bath and drying. That's where the melted candies had been. There's still a mark, but nothing like it started. And it does not feel sticky or anything to the touch. It's more of a color blemish than anything else.
Third pic ... Inside of the main compartment. The one blemish that had been in there is much less visible. You pretty much had to know it was there to begin with, to pick it out now.
Fourth pic ... Starting on the first side with Apple conditioner.
Ok, I know bunny and hyacinth, off the top of my head, use Lexol. I've always stuck with Apple primarily because it seems nice and mild to me, and we're careful about what chemicals we use in our house. We have eight parrots, which I also handle daily. Birds are more sensitive, so we really do watch what chemicals we use. The Apple seems nice and "mild", rubs into the leather well, and I can wash it off of my hands easily with Ivory soap. I use my bare fingers to rub the Apple into the leather, and I've never felt like my hands were being harmed, hence making me think "nice and mild".
So anyway, that's why I've always kept with the Apple conditioner. Note, also, that Apple does have the biggest qualification for leather, and that is that it is silicon-free. Conditioner with silicon, from what I've read, is bad for the leather. So in sticking with Apple, I'm at least covering the "biggest base" for being healthy for the leather.
Ok, sorry for the ramble. Moving on ...
Fifth pic .... partially rubbed in.
Rubbing the conditioner in is really just like rubbing handcream into your own skin. (Or at least it is for me.) And I do use my bare fingers. I know some places have said you can use a cloth. Well to be honest, my hands have never felt any adverse effects from the Apple, so I just use my bare fingers. (If anything, my hands come out 'softer' too.)
And the other reason I use my bare fingers is that it's easier to really massage the conditioner into the leather.
Look at it this way ... leather is fibrous inside. That means that the main mode of transport for the conditioner to move deeper through the fibrous material, is capillary action accelerated by movement/compression. As the fibers move against each other, and are compressed then decompressed, the conditioner moves along, pulled also by the capillary action. Well the movement/compression/decompression, is you doing the rubbing. And that rubbing can be more "textured" ... deeper and more varied ... if I just use my bare fingers.
So yeah, it's bare fingers and Apple for the rest of these pics tonight.
Again, sorry for the ramble, but I'm trying to be thorough.
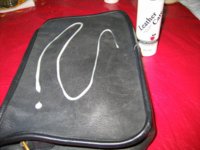
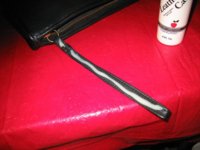
") ). My point with this pic is that I get even the trimmed edges. Anywhere that there is finished leather, even the trimmed edges, condition it. What you see in this pic is a thin line of conditioner along one edge trimming, that I'm about to rub into the trim.
). My point with this pic is that I get even the trimmed edges. Anywhere that there is finished leather, even the trimmed edges, condition it. What you see in this pic is a thin line of conditioner along one edge trimming, that I'm about to rub into the trim.