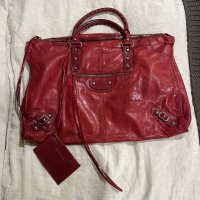
Last spring I bought a lovely 2003 Red Weekender *but* it came without tassels on the front or top zipper. I’d dyed spare tassels to match other bags in the past, and knew I could do the same with this, but didn’t get around to it til recently.
I’m very pleased with how they came out, and thought I’d share the process for anyone who might be interested in attempting something similar!
While in the past I’ve tinted existing tassels, this was a bit different because I actually ended up *making* these tassels with some goatskin flat leather cord. Materials, steps, details and pictures below.
Disclaimer: I am not a leathercraft professional by any means, just a dabbler with a fine arts background who enjoys getting crafty to repair, re-love, and extend the life of beautiful things!
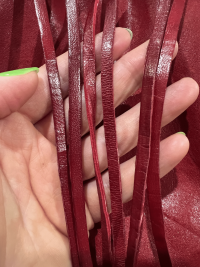
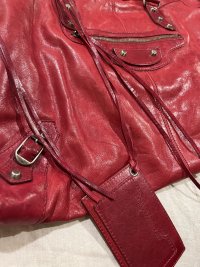
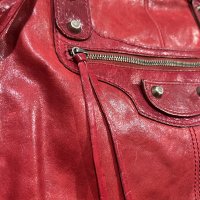
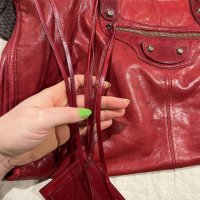
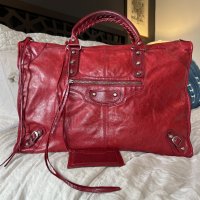
Comparison of new tassels (left, right) with existing tassel (center)
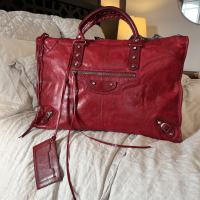
Et voilà! Mirror tassel is the original.
I’m very pleased with how they came out, and thought I’d share the process for anyone who might be interested in attempting something similar!
While in the past I’ve tinted existing tassels, this was a bit different because I actually ended up *making* these tassels with some goatskin flat leather cord. Materials, steps, details and pictures below.
Disclaimer: I am not a leathercraft professional by any means, just a dabbler with a fine arts background who enjoys getting crafty to repair, re-love, and extend the life of beautiful things!
Materials
- 5mm flat leather cord (natural)
- Sidenote - this cord is single faced, so if you’re making a tassel for a regular bag you’ll need to glue it together. If you have an earlier bag with single face tassels, this will work for that too! The 5mm cording also comes in black (tho I haven’t tried it yet vs the natural)
- Leather dye
- I use Fiebing’s. I have about 15-20 colors to give myself some options for mixing, as each color has different characteristics. I believe I used 4 to get this red tone.
- This was a saturated color, but for lighter colors you can use denatured alcohol to dilute the dye if needed.
- Small cup with sealable lid
- For holding the dye
- Eyedropper(s)
- For controlling dye when mixing
- Cotton swabs
- For easy disposable dye sampling
- Paper towels
- For easy disposable swatching (+ any cleanup)
- Wool daubers
- For dyeing
- Acrylic leather sealant
- I used Zelikovitz in matte finish
- Paintbrush
- For sealant application
- Scissors
- Palette paper
- For a protective surface
- For a protective surface
Steps
Color match the dye
- Sample colors (optional but highly recommended)
- I chose a few dyes I thought would work to achieve my desired color, and using a paper towel as a sample surface on top of my palette paper, dipped a cotton swab in each (1 swab/per) to make a few dabs on my paper towel.
I didn’t do a great job of taking photos during this process, but I basically did multiple dabs for each color in a line. One of them acted as my swatch of the color, and the others I used to layer on another color to see how they acted together.
If you have scrap leather, that would also work for swatching - or you could even swatch on the cording.
You certainly don’t have to do it this way (or at all), but I opted to because red can be tricky. In my experience a lot of reds run pink - hence busting out the orange, yellow, and light tan to temper them.
Colors Used
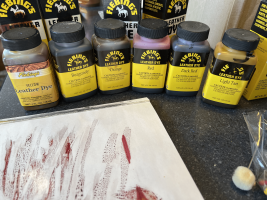
Used swabs + dropper
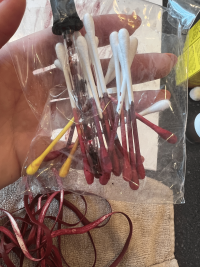
My very high tech swatching
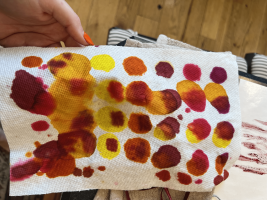
- I chose a few dyes I thought would work to achieve my desired color, and using a paper towel as a sample surface on top of my palette paper, dipped a cotton swab in each (1 swab/per) to make a few dabs on my paper towel.
- Mix and test
- Using the eyedropper, I started with a tablespoon or so of a base color in my little mixing cup and gradually added in some of the other tones.
After adding a few drops, I’d test the color again with another cotton swab on the paper towel, repeating the mixing and testing until I was satisfied with how the color matched the bag.
I should mention at this point that the bag was a very safe distance away from my workspace while this was going on, though I did keep the mirror near me (in a plastic bag) as a reference, and would carefully(!) compare a paper towel swatch / cotton swab to it.
End result - desired tint
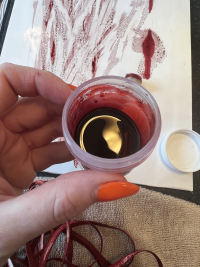
- Using the eyedropper, I started with a tablespoon or so of a base color in my little mixing cup and gradually added in some of the other tones.
- Sample colors (optional but highly recommended)
Measure and cut cord
I measured the single remaining tassel to use as a base length for the new ones.
Not the most exact science because depending on how you hold a tassel they can stretch a bit, but I went with 32”.
I cut a continuous length of cord 4 x 32”, plus a little extra just in case.
Dye the cord
- Step 1 - Dye
With the palette paper as a work surface and an old towel to the side, I dipped a wool dauber into my mixed dye and dyed only the top side moving from one end of the cord to the other.
As I progressed down the cord, I'd pile up the dyed part on the towel.
- Step 2 - Let it dry
Don’t skip this step.
- Step 3 - Buff
Once the cord is dry, take a clean cloth and gently buff to remove any excess dye.
- Repeat Steps 1 - 3.
Shortly after the first coat of dye
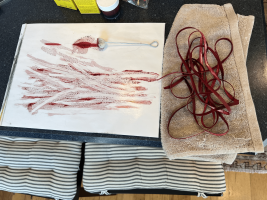
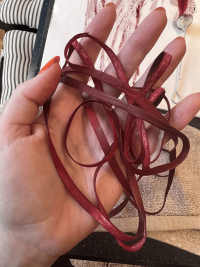
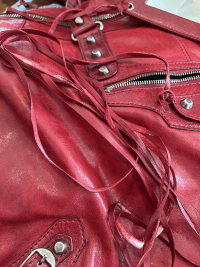
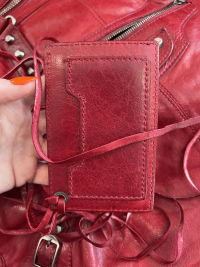
This is the first coat after drying for a few hours + buffing (yes yes I allowed the unsealed tassels to be directly on top of my bag. I felt comfortable doing it, but I’m admittedly a bit cavalier) 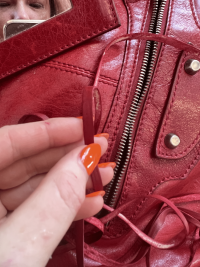
- Step 1 - Dye
Cut cord and glue the tassels
Once the cord was dried and buffed, I cut it into 4 even length pieces - 2 for each tassel.
I put a small coin of leather glue in the corner of a palette paper surface, and used a palette knife to skim the glue onto one inner side of the cord, and placed the other piece on top. The undersides of the cord are what get glued together.
I forgot to take any pictures of this process, but hopefully it's straightforward enough!
Seal the cord
Technically you could do 4 or 5 in any order, I just decided to glue first.
Note - even though you’re sealing the dye, this part will cause some dye to come up, so a palette paper or similar worksurface is recommended.
- Step 1 - Seal one side
I poured a bit of the acrylic finish on the palette paper and applied a thin coat to the tassel using a small paintbrush, going end to end the same way I did to dye the tassel.
- Step 2 - Let it dry
You definitely don’t want to be putting a still-tacky finished side down to do the other side!
- Step 3 - Repeat on other side
Repeat steps 1+2 for the other unsealed side.
While the dye penetrates the leather, the sealant sits on top of it. I went the slightest bit heavy with the first tassel I sealed. Not a dealbreaker, but learned for the second.
Once assembled, I trimmed the ends so that they were even, and cut off any small excess that didn’t match up from gluing (usually about 1/8 inch or less from one of the tassels)
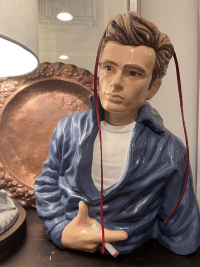
James Dean cookie jar serving as a drying rack. A hanger works just as well, but I forgot it in another room so he helped out in a pinch.
- Step 1 - Seal one side
Finish and assemble!
Once that sealant is dry… You now have tassels! Yay! Go get ‘em on your bag!
Comparison of new tassels (left, right) with existing tassel (center)

Et voilà! Mirror tassel is the original.






 Thank you for recording and sharing the steps you took. I have mixed colors myself, but never thought of using the swabs and paper towel instead of simply testing with a small brush on a plate. Your way is so much better.. Not to mention, it dries quickly on the paper so you get the final color almost immediately.