Looked up Pasquale shoe repair. They are currently closed on vacation and charge $36 a pair. Does anyone ever done a DIY ?
You are using an out of date browser. It may not display this or other websites correctly.
You should upgrade or use an alternative browser.
You should upgrade or use an alternative browser.
Red Rubber Soles Vibram, Chic, Soletech, etc.
- Thread starter DamierAddict
- Start date
More options
Who Replied?Looked up Pasquale shoe repair. They are currently closed on vacation and charge $36 a pair. Does anyone ever done a DIY ?
I'll be doing a DIY later this afternoon with some red 1mm
") That's if the wife brings me the contact adhesive when she gets back from the shops. I'll take a few pics and run through it on this thread.
That's if the wife brings me the contact adhesive when she gets back from the shops. I'll take a few pics and run through it on this thread.Should add I do this to all my shoes (men's shoes just to clarify) but with thicker 2mm black soles. It isn't really a biggie to do, but you do have to be careful.
Should add that I read a lot of people saying they are doing it to save the red sole. It won't save the red sole. You need to rough up the sole where the vibram to give the glue something to grip to.
With my shoes when I get them resoled or new I wear them for a few hours on pavement to let them naturally rough up a bit. Then I sand any shiny spots.
p.s. You are paying a lot for these soles off ebay = £3.99 inc shipping (UK):
http://www.ebay.co.uk/itm/181807974401?_trksid=p2057872.m2749.l2649&ssPageName=STRK:MEBIDX:IT
Last edited:
As promised I have logged how I put vibrams on. They won’t be quite as good as a good cobblers but should be as good as some that I have seen on here.
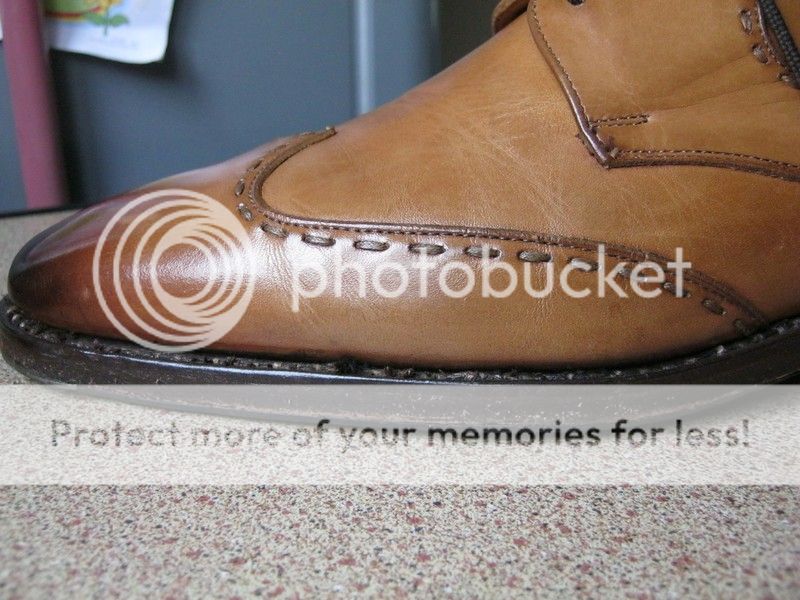
As an intro I do this to my shoes. The ones I use here are 2mm. I also add a toe plate (lulu)because my toe catches the floor as my foot lifts up. I will use the shoes for a few hours or days until the sole is roughed up a bit to give something for the glue to adhere:

And from the side they are almost invisible even though they are 2mm. I bevel the edges but I don’t make them as tidy as I plan to do with the Louboutins (I have seen how you girls want perfection here ) Please ignore the uncoloured leather where the sole joins the rubber on these shoes. This particular cobbler is great at resoling but rubbish at edge dressing. I forgot to tell him not to do the edge dressing as I like it to be natural and he did it getting edge dressing on the upper. Aaargh. So this shoe will be stripped, redyed, and then repolished.
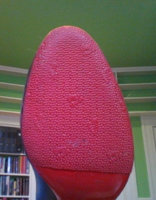
This is one of my ‘gents’ soles with the 1mm red vibram for comparison:
And a quick shot of the visible sole:

And a quick shot of what will be the visible sole:

As a prelude to adding the vibrams (look away now) I resprayed the soles as they were really scratched and dull. I colour matched them to Halfords ‘Ford Colorado Red’. It was an exact match for the Pigalle and very slightly lighter than the VP. There are masses of reds to choose from. I must have looked crazy with Pigalle in hand, setting it against each different red in the shop. He, he.

The paint has sunk into the stamps on the bottom a bit, as you can see, but after a good microfibre rubbing they are really really shiny now:

I will continue but is taking some time to do. I am having to use photobucket instead of my webhosting and photobucket is not so user friendly as it used to be.
To be continued.........
As an intro I do this to my shoes. The ones I use here are 2mm. I also add a toe plate (lulu)because my toe catches the floor as my foot lifts up. I will use the shoes for a few hours or days until the sole is roughed up a bit to give something for the glue to adhere:
And from the side they are almost invisible even though they are 2mm. I bevel the edges but I don’t make them as tidy as I plan to do with the Louboutins (I have seen how you girls want perfection here
) Please ignore the uncoloured leather where the sole joins the rubber on these shoes. This particular cobbler is great at resoling but rubbish at edge dressing. I forgot to tell him not to do the edge dressing as I like it to be natural and he did it getting edge dressing on the upper. Aaargh. So this shoe will be stripped, redyed, and then repolished.
This is one of my ‘gents’ soles with the 1mm red vibram for comparison:
And a quick shot of the visible sole:
And a quick shot of what will be the visible sole:
As a prelude to adding the vibrams (look away now) I resprayed the soles as they were really scratched and dull. I colour matched them to Halfords ‘Ford Colorado Red’. It was an exact match for the Pigalle and very slightly lighter than the VP. There are masses of reds to choose from. I must have looked crazy with Pigalle in hand, setting it against each different red in the shop. He, he.
The paint has sunk into the stamps on the bottom a bit, as you can see, but after a good microfibre rubbing they are really really shiny now:
I will continue but is taking some time to do. I am having to use photobucket instead of my webhosting and photobucket is not so user friendly as it used to be.
To be continued.........
Last edited:
Onto vibraming . Pictures may be of different shoes because I do one at a time and some pictures were poor, blurry or I forgot to take a picture so I filled in the pictures on the next shoe and so on until I got what I wanted.
Firstly we have the worn sole here:

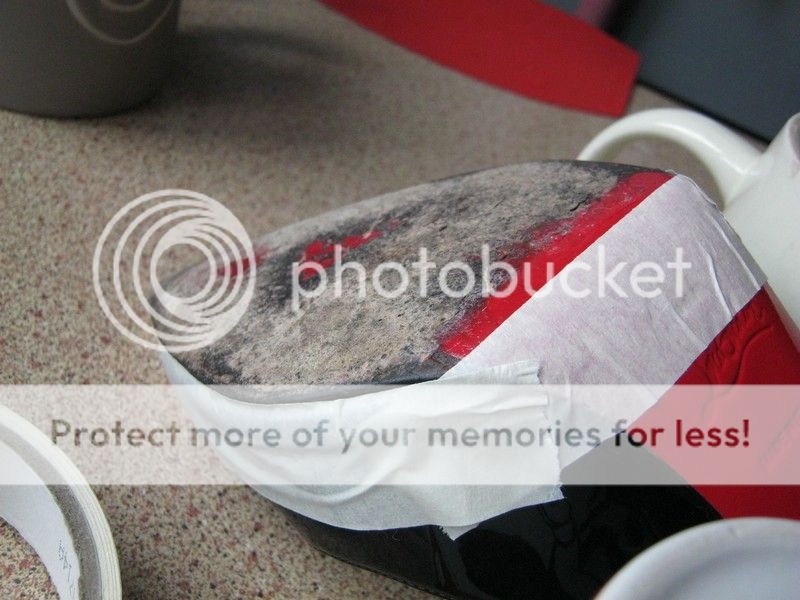
Then decide where you want the vibram to end and tape that line. Keep it straight!!! This is the key piece of tape as it is going to be your only guide when you line up the vibram:

Then tape around the rest of the forefoot sole to minimise getting contact adhesive on the shoe upper. It will come off OK but its just to reduce the amount of cleaning afterward:
This particular shoe has a little bit of the sole lifting so I will stick this down first:

I put a little contact adhesive on some card (the packet of the adhesive in this case) and using a Stanley blade I take a little bit and wipe it on both surfaces while holding the lifted piece away from the shoe. After a minute I press it down and we are ready to move on:
I will also use the contact adhesive to mend this cough, cough littlenick in the heel:

continues.....
Firstly we have the worn sole here:
Then decide where you want the vibram to end and tape that line. Keep it straight!!! This is the key piece of tape as it is going to be your only guide when you line up the vibram:
Then tape around the rest of the forefoot sole to minimise getting contact adhesive on the shoe upper. It will come off OK but its just to reduce the amount of cleaning afterward:
This particular shoe has a little bit of the sole lifting so I will stick this down first:
I put a little contact adhesive on some card (the packet of the adhesive in this case) and using a Stanley blade I take a little bit and wipe it on both surfaces while holding the lifted piece away from the shoe. After a minute I press it down and we are ready to move on:
I will also use the contact adhesive to mend this cough, cough littlenick in the heel:
continues.....
Now line the vibram up against the piece of tape you first put on the soles as a guide, and tape the vibram in that position. Use your thumb to keep the vibram in that exact position and turn the shoe upright vibram down. If the vibram moves redo this step until you are sure it is still against the tape guide line:

Now with the vibram in position draw around the shoe. Don't get too close to the shoe as you will not get the vibram exactly in this position when you come to gluing it. Make sure you leave 5mm - 1cm all around to allow for being slightly off when gluing.

Then cut along your marked line:

Now sand the sole lightly right up to the tape guideline. In my case I had to sand a bit more where my respray was to rough it up and remove the gloss:

Apply contact adhesive to the surfaces. Don't be scared it isn't going to squidge out the sides when I put the pieces together. Do the vibram first and then spread the glue from the centre to the edge (Forgot to take the 'after spreading' picture here.) I use a foam brush. Get right to the edge and try to do this is as few strokes as possible. This stuff congeals fast and as the name suggests the contact adhesive on the brush will react to the contact adhesive you are spreading.
This is why I do one shoe at a time. It lets the adhesive dry on the foam brush and then I can use it again on the next shoe.


Wait a minute until both surfaces are slightly tacky and we are ready to put the vibram on.
continues....
Now with the vibram in position draw around the shoe. Don't get too close to the shoe as you will not get the vibram exactly in this position when you come to gluing it. Make sure you leave 5mm - 1cm all around to allow for being slightly off when gluing.
Then cut along your marked line:
Now sand the sole lightly right up to the tape guideline. In my case I had to sand a bit more where my respray was to rough it up and remove the gloss:
Apply contact adhesive to the surfaces. Don't be scared it isn't going to squidge out the sides when I put the pieces together. Do the vibram first and then spread the glue from the centre to the edge (Forgot to take the 'after spreading' picture here.) I use a foam brush. Get right to the edge and try to do this is as few strokes as possible. This stuff congeals fast and as the name suggests the contact adhesive on the brush will react to the contact adhesive you are spreading.
This is why I do one shoe at a time. It lets the adhesive dry on the foam brush and then I can use it again on the next shoe.
Wait a minute until both surfaces are slightly tacky and we are ready to put the vibram on.
continues....
Can't take pictures while I am doing the next bit as this stuff cures quickly on contact.
Line up the edge of the vibram against the taped guideline, then place that edge in position. Make sure you are just lining up the edge and the rest of the vibram doesn't touch the sole or you may well have a problem here.
Now from that lined up edge press the centre of the vibram down moving along the centre of the sole to the tip of the shoe.
When you have got to the tip start pressing from the centre outward bit by bit. Finally make sure you have pressed right to the edge.
I then use my knuckles to 'knead' the whole sole. cobblers will probably use a hammer to do this.


When you have finished pummelling you can remove the tape. Do the guideline first as the edges may be just under the vibram.
Give the edges another press to make sure you have joined the vibram right to the edge of the sole. Don't push it over the edge and onto the shoe upper though.

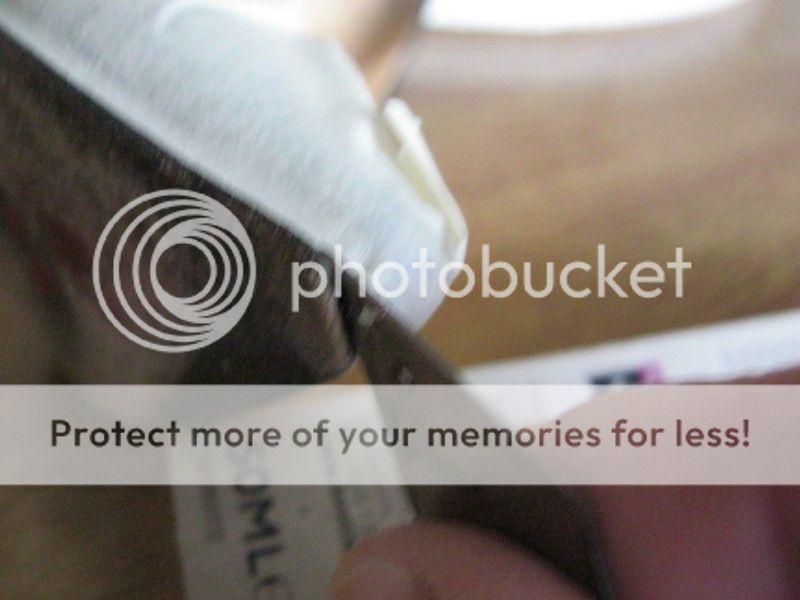
Now I take a brand new good quality knife blade and trim the excess away. I get close to the sole first to make things easier and then take little bits off right up to the sole. Be careful not to touch the upper. Cobblers will do this bit in one stroke with a different knife blade that has a 'hooklike' end to it. I prefer the control of a standard blade though. This cut is a parallel cut to the sole.
I then trim with the blade at 60 degrees to the sole to bevel the edge of the vibram. This will stop it being so visible when worn.

I then use some very rough (P60) aluminium oxide paper and sand the edge of the vibram at an angle until it also takes the edge dressing off the sole leather. You shouldn't be able to see the glue join line after this.

p.s. this is where that heel nick is at now:

continues.....
Line up the edge of the vibram against the taped guideline, then place that edge in position. Make sure you are just lining up the edge and the rest of the vibram doesn't touch the sole or you may well have a problem here.
Now from that lined up edge press the centre of the vibram down moving along the centre of the sole to the tip of the shoe.
When you have got to the tip start pressing from the centre outward bit by bit. Finally make sure you have pressed right to the edge.
I then use my knuckles to 'knead' the whole sole. cobblers will probably use a hammer to do this.
When you have finished pummelling you can remove the tape. Do the guideline first as the edges may be just under the vibram.
Give the edges another press to make sure you have joined the vibram right to the edge of the sole. Don't push it over the edge and onto the shoe upper though.
Now I take a brand new good quality knife blade and trim the excess away. I get close to the sole first to make things easier and then take little bits off right up to the sole. Be careful not to touch the upper. Cobblers will do this bit in one stroke with a different knife blade that has a 'hooklike' end to it. I prefer the control of a standard blade though. This cut is a parallel cut to the sole.
I then trim with the blade at 60 degrees to the sole to bevel the edge of the vibram. This will stop it being so visible when worn.
I then use some very rough (P60) aluminium oxide paper and sand the edge of the vibram at an angle until it also takes the edge dressing off the sole leather. You shouldn't be able to see the glue join line after this.
p.s. this is where that heel nick is at now:
continues.....
Now that the join is seamless other than the colour difference I would normally on my shoes go over the sole edge with neutral waz polish to smooth the leather and give it some shine however that is because I like to see the leather layers of the sole.
With these shoes I would use black polish however that would show on a red sole (until rubbed off through a wear or 2) so.........I'm going to use the most hated purseblog item!!! Out with the sharpie
I go over the leather and the bevelled edge of the vibram to give a nice clean crisp edge:


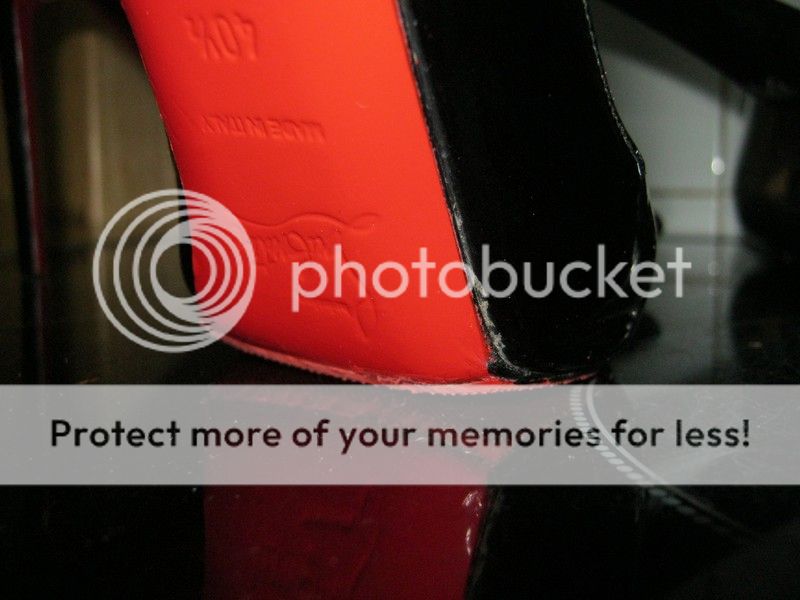
Now one thing I don't normally do is try and 'blend' the rubber to the sole. I read you girls prefer that so I'll have a go....eek. This is a case of carefully skimming off the rubber at an angle with the blade I used earlier and therefore may leave a few scratches in the red sole I just resprayed. Whilst not as good as a lot of the cobbler jobs I've seen on here I'm reasonably happy with this:


A few shots of the finished vibrams. You can see there is minimal red visible which is what I was aiming for (need to get the microfibre cloth out on that patent now:

And just to finish I use a bit of tape over the vibram edge and spray over the bevelled 'blend':

So thats how to do it yourself. Its very easy to do however it can be tricky to get it to look anything like the top cobblers get it. I would suggest if your cobbler does it well and is charging under £20/$30 then for shoes that cost £400+ you should really use the professionals.
If I wasn't taking photos and working on them one after another I would say both pairs would be done start to finish in an hour or less.
With these shoes I would use black polish however that would show on a red sole (until rubbed off through a wear or 2) so.........I'm going to use the most hated purseblog item!!! Out with the sharpie
I go over the leather and the bevelled edge of the vibram to give a nice clean crisp edge:
Now one thing I don't normally do is try and 'blend' the rubber to the sole. I read you girls prefer that so I'll have a go....eek. This is a case of carefully skimming off the rubber at an angle with the blade I used earlier and therefore may leave a few scratches in the red sole I just resprayed. Whilst not as good as a lot of the cobbler jobs I've seen on here I'm reasonably happy with this:
A few shots of the finished vibrams. You can see there is minimal red visible which is what I was aiming for (need to get the microfibre cloth out on that patent now:
And just to finish I use a bit of tape over the vibram edge and spray over the bevelled 'blend':
So thats how to do it yourself. Its very easy to do however it can be tricky to get it to look anything like the top cobblers get it. I would suggest if your cobbler does it well and is charging under £20/$30 then for shoes that cost £400+ you should really use the professionals.
If I wasn't taking photos and working on them one after another I would say both pairs would be done start to finish in an hour or less.

WOW. thanks for this DIY. That was impressive! I think I'm going to shy away from DIY and try to find a cobbler who charges a little less (I have 8 pairs of Loubs that I need done)Now that the join is seamless other than the colour difference I would normally on my shoes go over the sole edge with neutral waz polish to smooth the leather and give it some shine however that is because I like to see the leather layers of the sole.
With these shoes I would use black polish however that would show on a red sole (until rubbed off through a wear or 2) so.........I'm going to use the most hated purseblog item!!! Out with the sharpie
I go over the leather and the bevelled edge of the vibram to give a nice clean crisp edge:
Now one thing I don't normally do is try and 'blend' the rubber to the sole. I read you girls prefer that so I'll have a go....eek. This is a case of carefully skimming off the rubber at an angle with the blade I used earlier and therefore may leave a few scratches in the red sole I just resprayed. Whilst not as good as a lot of the cobbler jobs I've seen on here I'm reasonably happy with this:
A few shots of the finished vibrams. You can see there is minimal red visible which is what I was aiming for (need to get the microfibre cloth out on that patent now:
And just to finish I use a bit of tape over the vibram edge and spray over the bevelled 'blend':
So thats how to do it yourself. Its very easy to do however it can be tricky to get it to look anything like the top cobblers get it. I would suggest if your cobbler does it well and is charging under £20/$30 then for shoes that cost £400+ you should really use the professionals.
If I wasn't taking photos and working on them one after another I would say both pairs would be done start to finish in an hour or less.
Where in SF is your cobbler located?I have experience with them. My SF cobbler goes back and forth between TOPY and Vibram. IMO, the TOPY has a more orangey shade, whereas the Vibram is closer to the red sole. They are both good soles. I'll happily accept whichever one my cobbler uses. Sure, I prefer the shade of the Vibram, but I like the surface of the TOPY one more. IMO it has more traction. You can't go wrong with either one.
Just saw these great little red sole pads
They come 2 pairs per pack @ $6.99 from Shoe Care Supplies

https://www.shoecaresupplies.com/product_p/penguin-pads.htm
They come 2 pairs per pack @ $6.99 from Shoe Care Supplies
The Penguin Pad is a unique cold weather accessory that will instantly give you better traction, confidence and safety when braving the icy weather conditions. Simply peel and stick the Penguin Pad to the soles of your shoes or boots. Comes in Large or Small. 2 pair per package
https://www.shoecaresupplies.com/product_p/penguin-pads.htm
Just saw these great little red sole pads
They come 2 pairs per pack @ $6.99 from Shoe Care Supplies
https://www.shoecaresupplies.com/product_p/penguin-pads.htm
UPDATE. I ordered these and they arrived. They are day-glo orange, not red as pictured!
The cobbler has pasted a beige topy heel protectors instead of the red ones. Can they be peeled off and a red one fixed or should I get the red stain meant for CLs and have it painted?
They can be removed and replaced with red ones.The cobbler has pasted a beige topy heel protectors instead of the red ones. Can they be peeled off and a red one fixed or should I get the red stain meant for CLs and have it painted?

As an FYI; In San Francisco Wilkes has them done for me and they use GTO Italia ( https://www.amazon.com/LOUBOUTIN-Sole-repair-rubber-soles/dp/B00A6MK2IC ) I think they have Anthony's do their work.
Attachments
Register on TPF! This sidebar then disappears and there are less ads!